Showing posts with label Barry M. Show all posts

Tuesday, 21 May 2013

Sponge Gradient - Tutorial

I have put this off far too long!
I've finally done a photo tutorial on how I do a sponge gradient.
It's no different to any other sponge gradient tutorial I'm sure but I did promise one then promptly forgot!
Better late than never though :-)


You will need-
White nail polish for your base.
Two or more polishes of your choosing.
A piece of kitchen sponge.
Acetone.
Clean up brush/cotton buds.

First of all I'll just say that the type of sponge I use is the yellow ones with the green scouring pad on the top, I just cut off the yellow sponge then cut that into roughly eight smaller pieces.


Step 1 - Apply a base of your white polish and let it dry.
Step 2 - Dampen your piece of sponge, then paint you chosen colours onto the sponge.
Step 3 - Dab the sponge onto the nail.
Step 4 - Keep dabbing while moving the sponge up and down the nail slightly ensuring you cover the whole nail and creating a blend between the colours. Leave to dry for a couple of minutes.
Step 5 - Repeat Step 4 to get a more even coverage and better colour pay off.
Step 6 - Clean up around the nail and finish with your chosen top coat.

If I'm not using the gradient for a base for nail art then I like to add a coat of China Glaze Fairy Dust over the top to give it a bit of sparkle which is what I have done in the photos below.


I hope that was easy enough to follow!? 
I am going to make an effort to do more tutorials for you, the reason why I haven't before is because usually I don't know what I'm going to do when I sit down to do my nails so it doesn't occur to me to stop and take a photo at each stage. I think my best bet is to do video tutorials but that involves a new camera and learning how to edit which quite frankly terrifies me, but I am looking into it!
In the mean time if there are any other tutorials you would like me to attempt here on the blog then let me know, I will certainly give it a whirl!

♥ A ♥

Wednesday, 15 May 2013

Studded Spring Floral - Nail Art

If you follow me on Instagram then you may have already seen todays nails.
The sun had put me a in a Spring mood but I wasn't ready to stop playing with the Nail Studs so I decided to try a studded floral design.


I used two coats of Barry M Matt White as a base then used some paper hole reinforcer stickers to mark off the half moons on my pinky and index fingers and used Barry M Black with a fine nail art brush to freehand the stripes. On my thumb, middle and ring fingers I used Barry M Baby Pink and Lemon Ice Cream with a nail art brush to randomly add some petal shapes and Barry M Black again for the 'stalks'. I then gave all five nails a coat of China Glaze No Chip Top Coat and applied the studs whilst that was still wet. When that had dried I finished with another layer of top coat.

I loved these, I liked the mix of delicate pink and yellow floral with bold stripes and studs, I thought they worked nicely together. I think it will looks equally as good using some brighter colours for the flowers, maybe red and fuchsia.

Let me know what you think!

♥ A ♥
Monday, 4 February 2013

Camouflage - Nail Art

Happy Monday to you all, I hope everyone has had a good start to their week!
Today I have some nail art for you that was inspired by a YouTube video by Love4Nails.
Back in November Love4Nails uploaded a Camouflage Nail Art Design Tutorial.
I loved the design and the colours she used together, however my nails are a lot shorter than hers so I had to adapt the design a bit. Instead of doing a camouflage french, I did a mix of half moons and full nails.


I love these so much!
I used two coats of OPI Skull & Glossbones as my base colour then started with large, random blobs of  Models Own Bronze Rage. For the green I mixed Barry M Lime Green, Mint Green, Spring Green and Mushroom and applied that randomly again overlapping slightly on some of the bronze, then I used Barry M Black for the smaller blobs. Finally I added Barry M Green Glitter over the top of the green and a coat of Seche Vite to finish.
Then I got curious and for the first time in quite a while I went and got my No7 Stay Perfect Matte Topcoat to see what it looked like matte.


I like it, but much prefer it glossy!
What do you think?

♥ A ♥
Tuesday, 8 January 2013

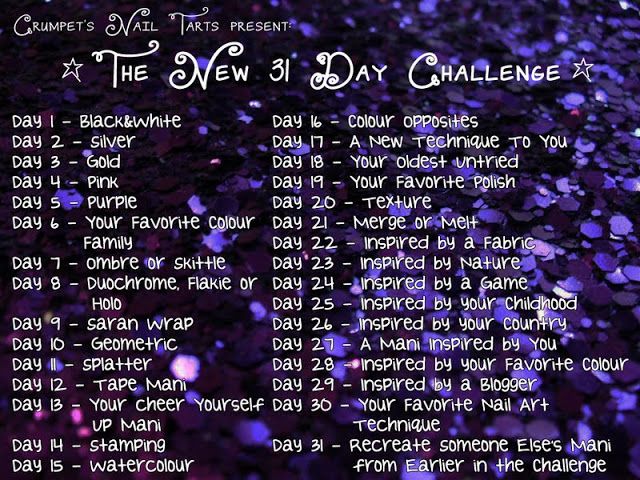
The New 31 Day Nail Challenge - Day 8 - Duochrome, Flakie or Holo

Today is Day 8 of the challenge and we had the choice of Duochrome, Flakie or Holo.
I chose Duochrome as I only have one holo and one one flakie. This is simply not good enough, I will be remedying that ASAP.

On to the nails.


When I walked the Mini Tips to school this morning the weather was beautiful with a lovely blue sky, but by the time it came to taking these photographs it was back to dull grey clouds. Not the most ideal conditions for photographing duochrome nail polish but I did what I could.
Roll on Summer!

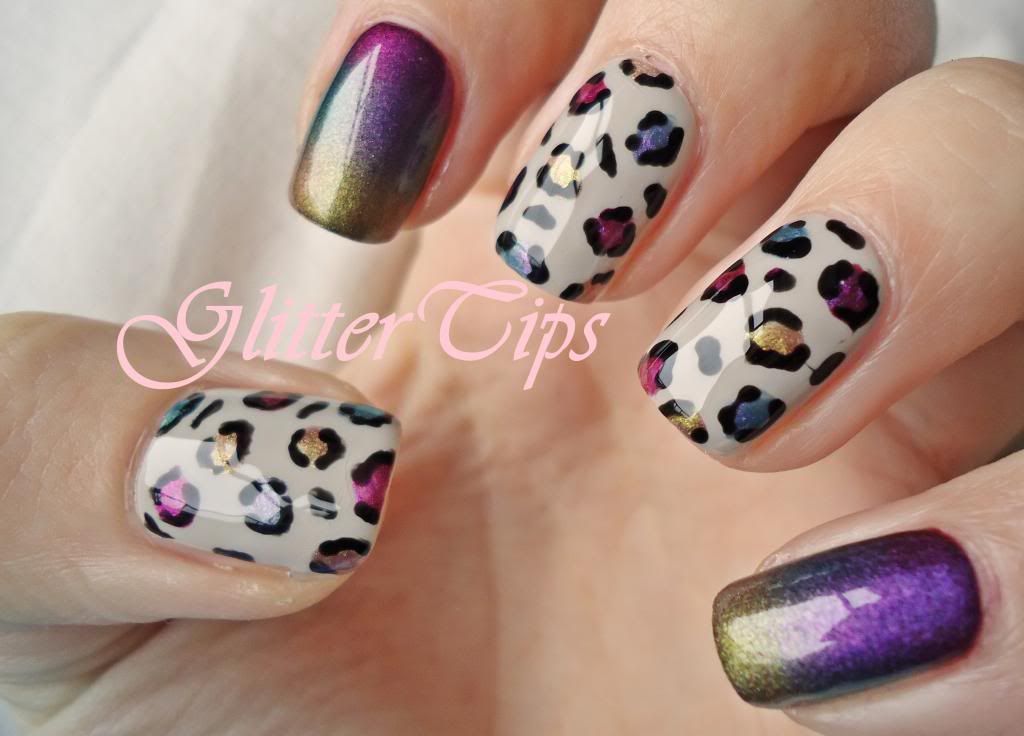
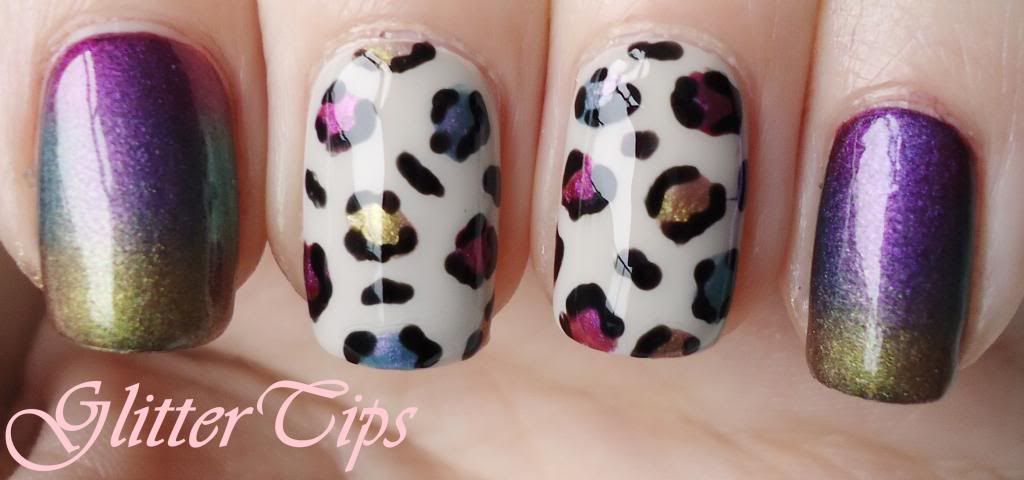
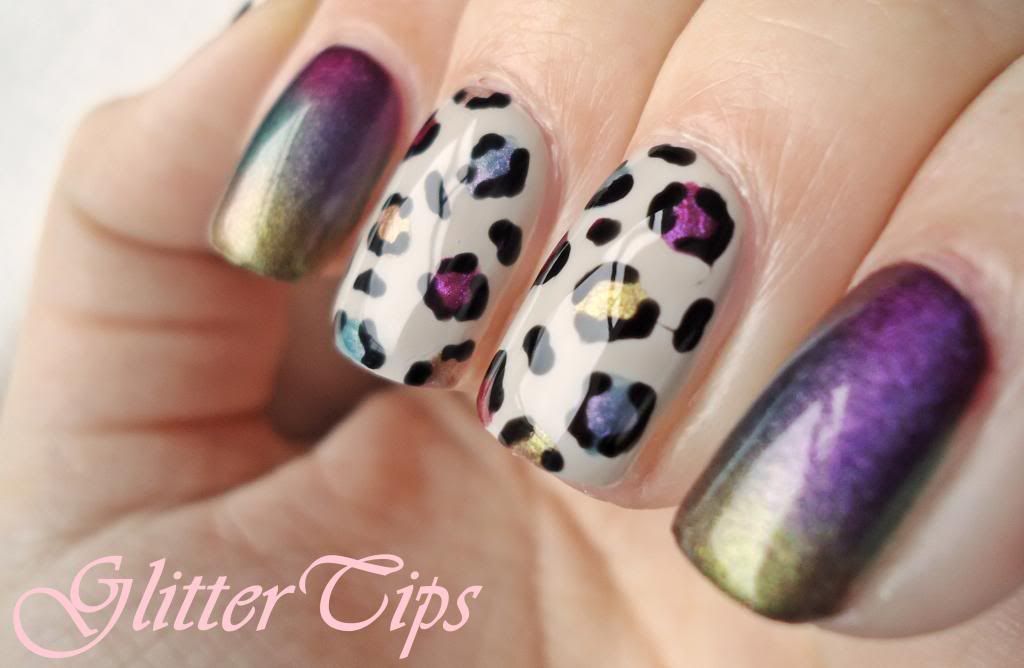
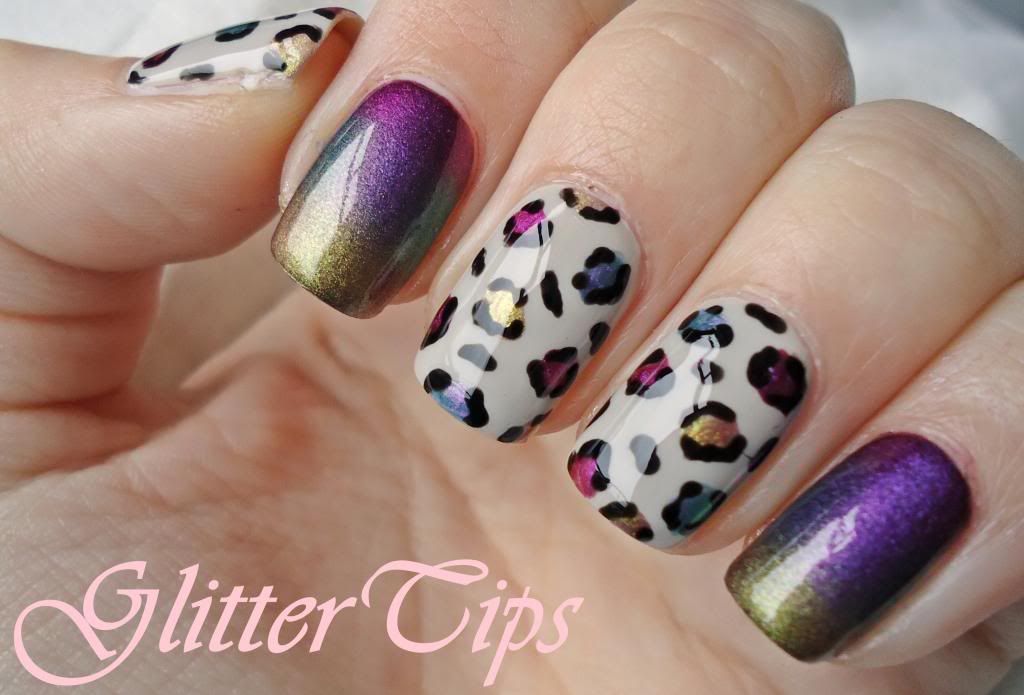
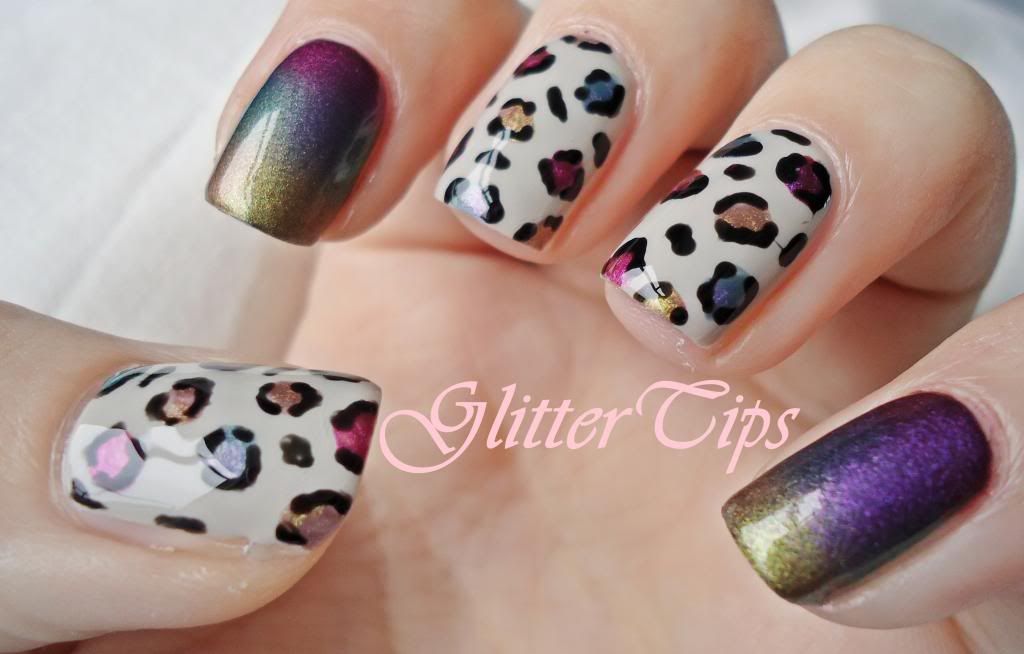
For this design I started with two coats of Barry M Black on the pinky and index fingers, and one coat of Barry M Matt White on the rest. Then over the white I used two coats of OPI Skull & Glossbones.
Next I decided to use three of Rimmel Londons Metal Rush polishes (Review and Swatches here) in Purple Reign, Royal Blue and Gold Save The Queen for a gradient on the pinky and ring fingers and leopard spots on the other three then used Barry M Black to finish of the leopard print.

I love these so much I really don't want to take them off tomorrow!


Tomorrows challenge is Saran Wrap which I have never tried before!
Can't wait to see how that turns out, and don't forget to take a look at what the other ladies taking part have been coming up with!

♥ A ♥
Monday, 7 January 2013

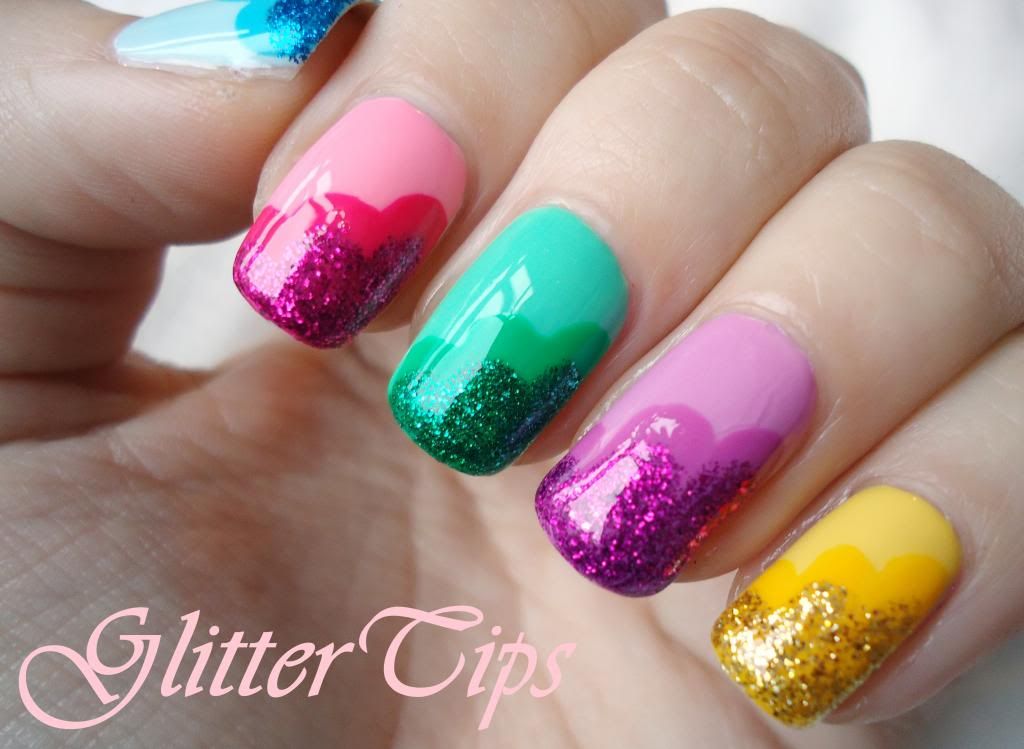
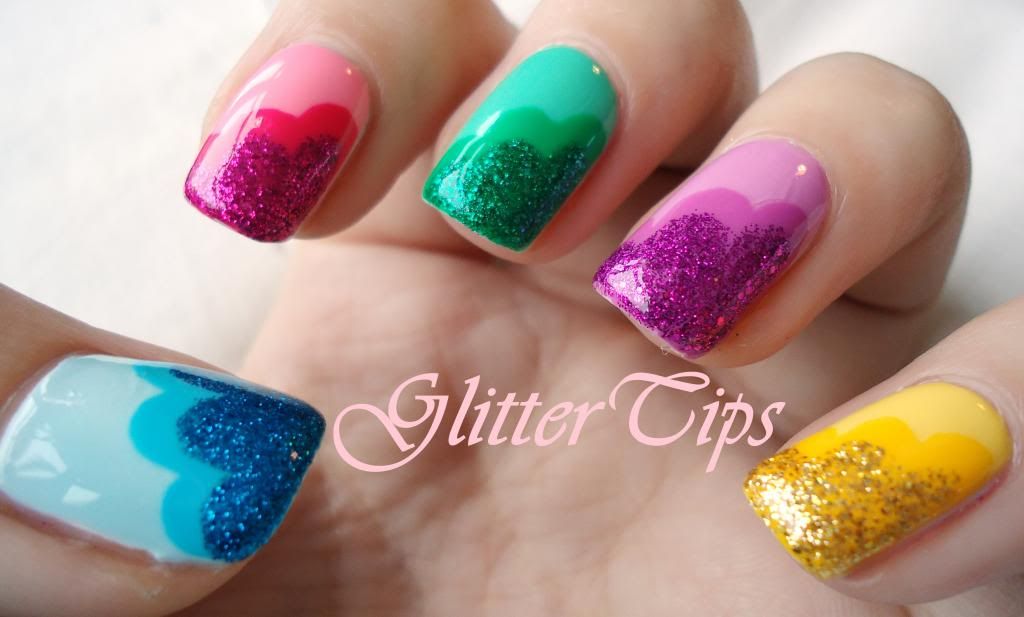
The New 31 Day Nail Challenge - Day 7 - Ombre or Skittle

So we are one week into The New 31 Day Nail Challenge and today is Ombre or Skittle day.
Ombre wasn't appealing to me today so Skittle it was.


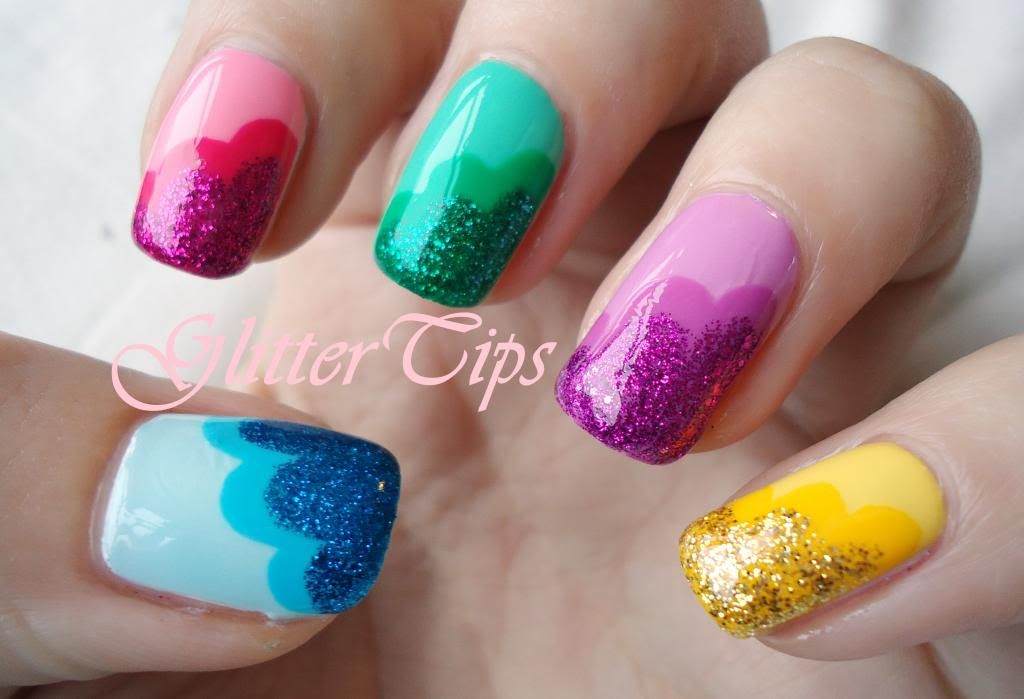
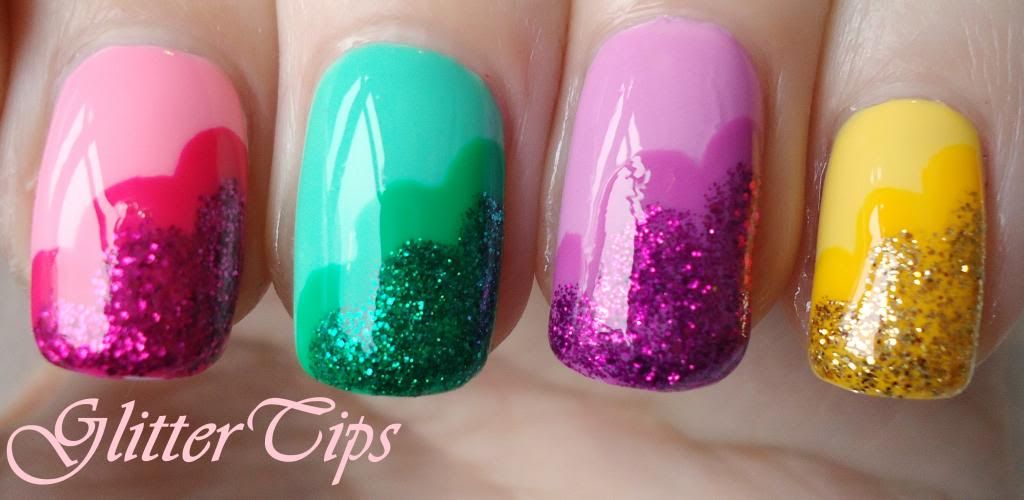
I have used this colour combination before in the Makeup Savvy challenge and I like it so much I decided to use it again but with a Cloud Mani as that's something I hadn't done before!

The polishes used are -
Thumb - Barry M Blue Moon, Pure Turquoise and Blue Glitter.
Index - Barry M Strawberry Ice Cream, Shocking Pink and Models Own Magenta Divine.
Middle - Barry M Mint Green, Spring Green and Green Glitter.
Ring - Barry M Berry Ice Cream, Boots LE Purple, and Magenta Glitter.
Pinky - Barry M Lemon Ice Cream, Yellow and Gold Glitter.


Tomorrows theme is Duochrome, Flakie or Holo!
Can't wait!

♥ A ♥

Sunday, 6 January 2013

The New 31 Day Nail Challenge - Day 6 - Favourite Colour Family

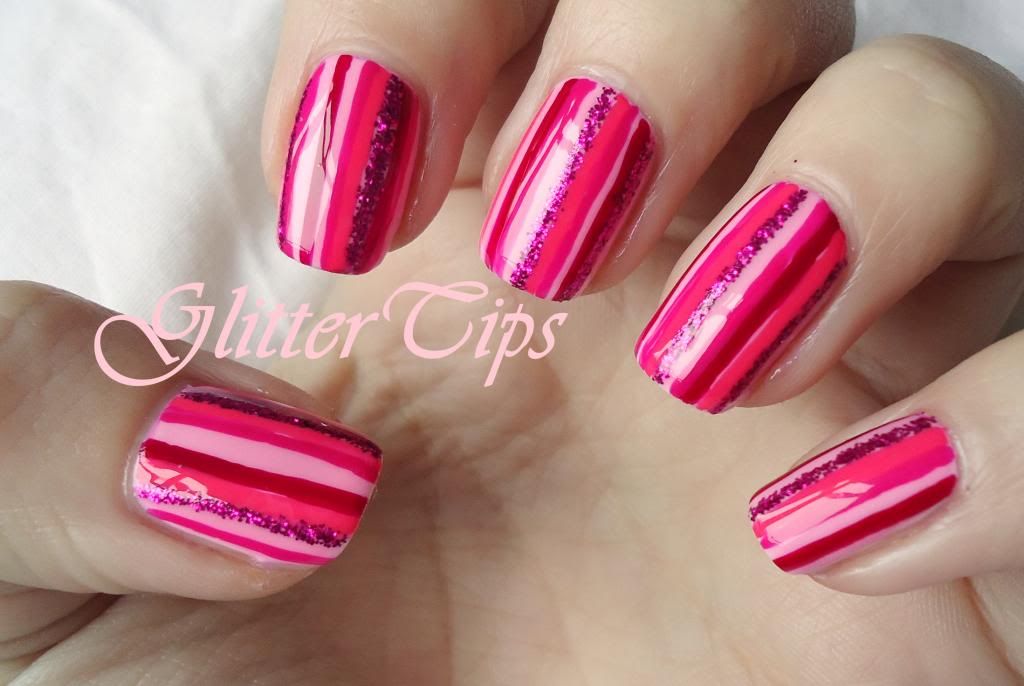
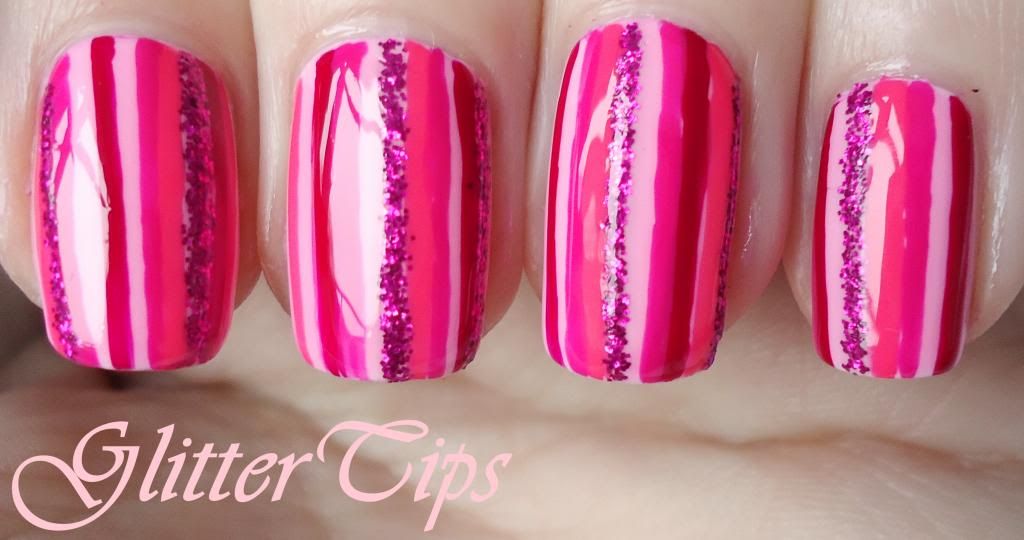
Day 6 of the challenge is 'Your Favourite Colour Family'.
I wasn't sure what to do for this one colour wise. As you know Pink is my favourite colour, we have already had a Pink Day, and later on in the challenge one of the challenges is 'Inspired By Your Favourite Colour'. I briefly toyed with the idea of using a different colour today so as not to over load you with Pink, but then I wouldn't be using my favourite colour family.
So Pink it is!


The appalling light we have had lately has led to these photos coming out a little Red toned but I assure you, in person it's definitely Pink!
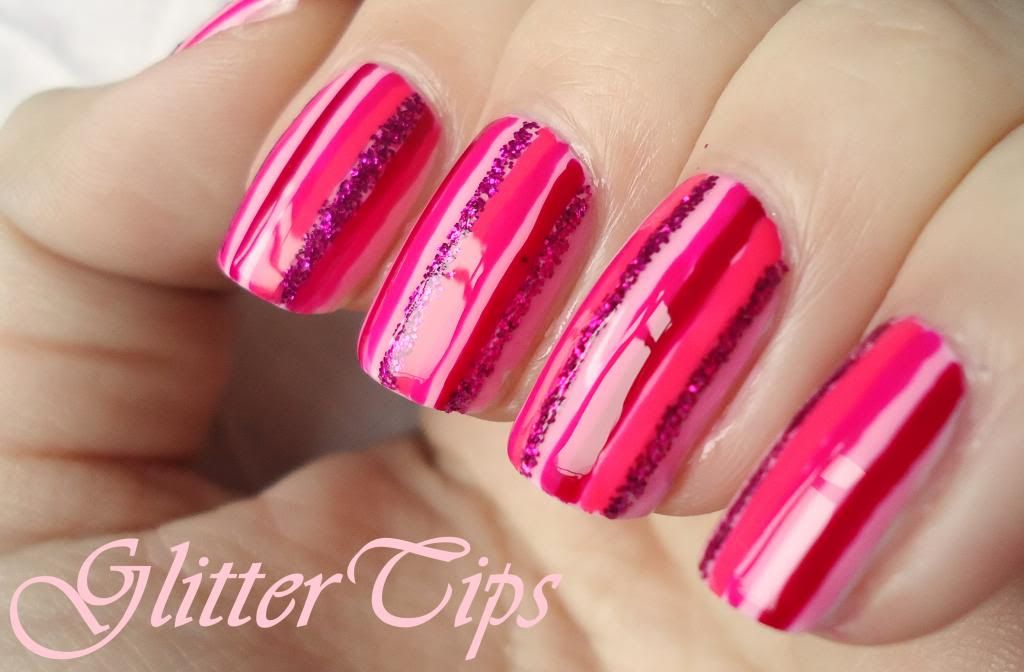
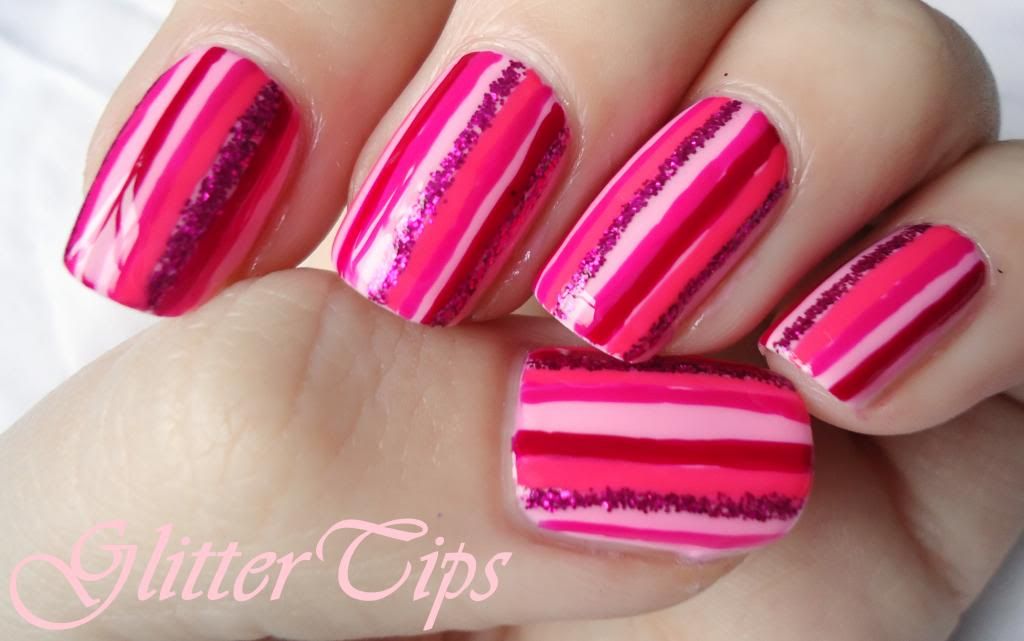
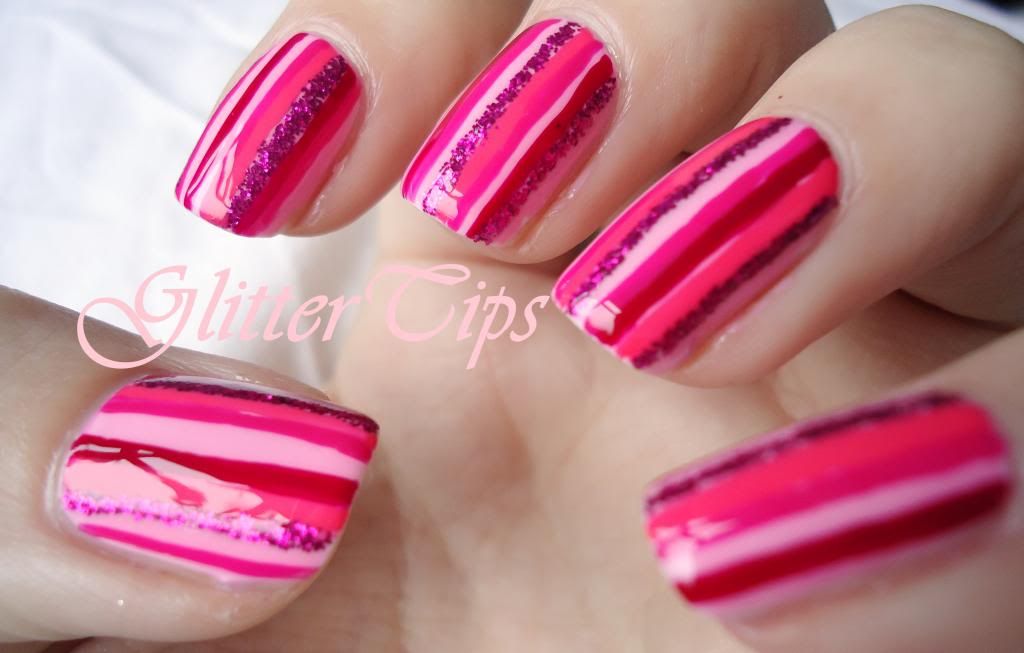
The polishes used were, two coats of Barry M Matt White as a base, then a coat of Barry M Strawberry Ice Cream. I then free handed the stripes using Barry M Raspberry, Barry M Shocking Pink, Barry M Gelly Grapefruit, and Models Own Magenta Divine Glitter.

Up next is Ombre or Skittle.


Don't forget to take a look at all the other very talented challengers!

♥ A ♥

Monday, 26 November 2012

Lazy 15 Nail Challenge - Day 11 Fireworks/Bonfire Night Nails

Just a quick one today as I have a poorly little boy off school today!

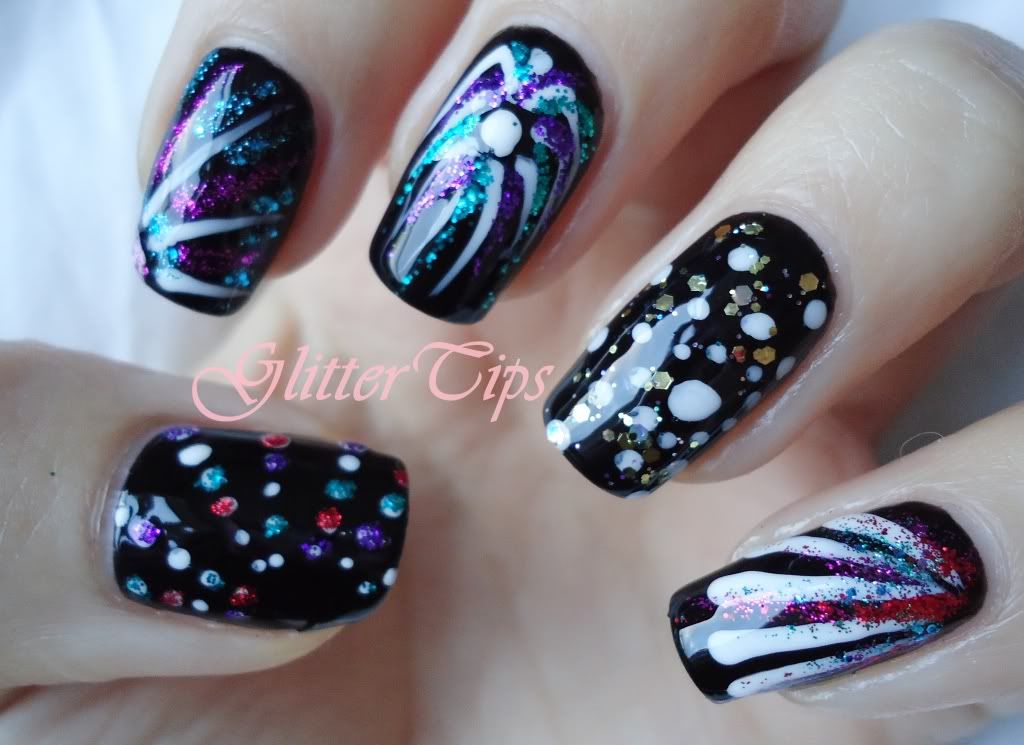
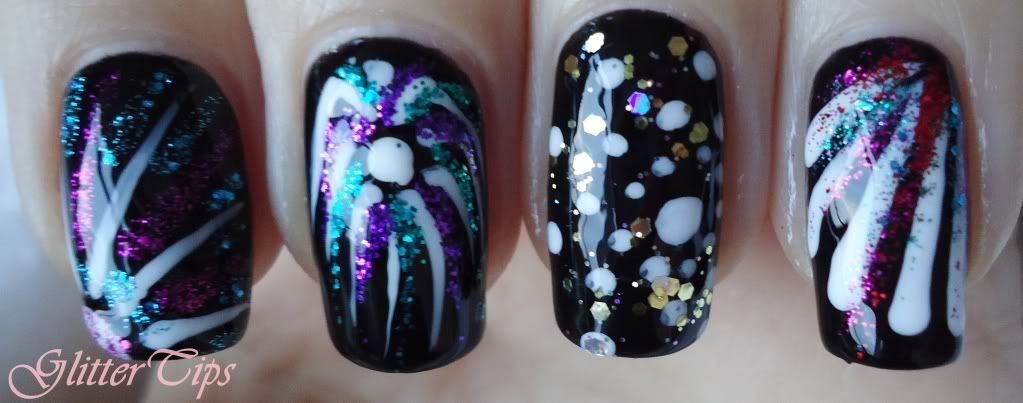
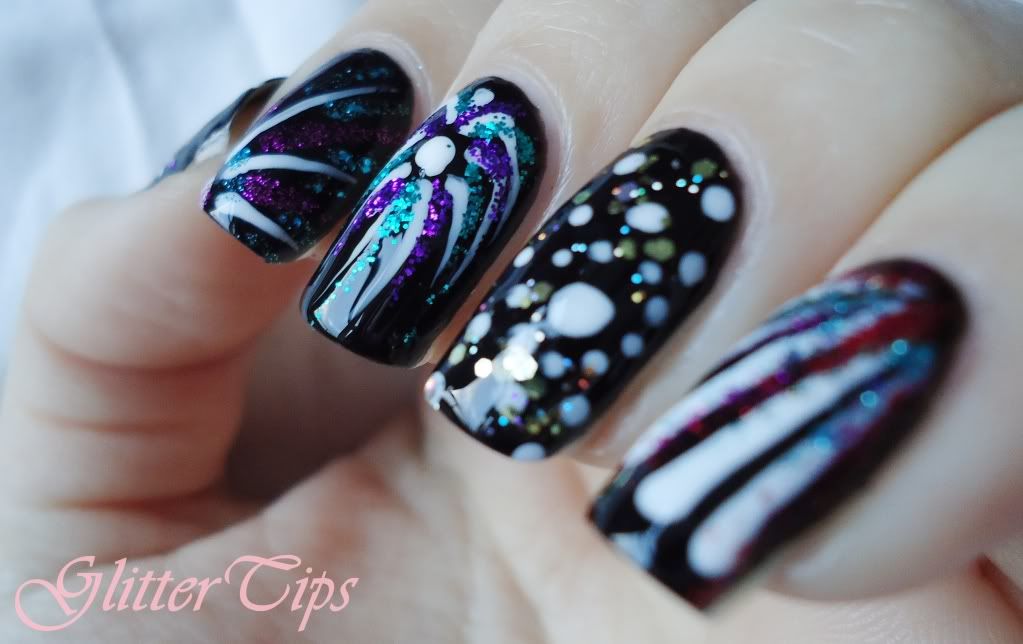
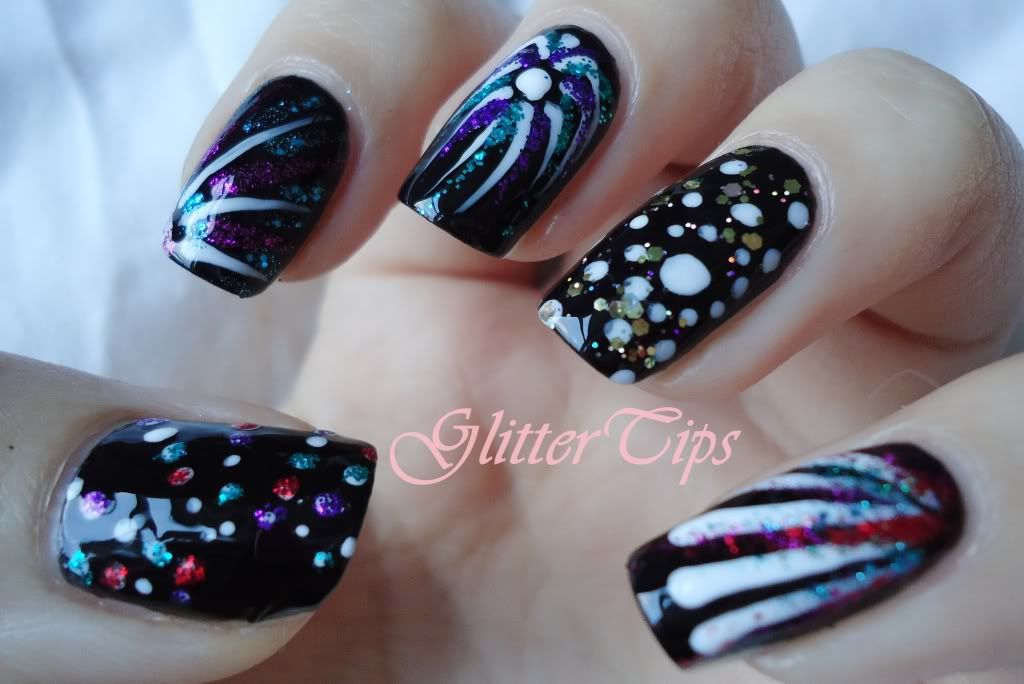
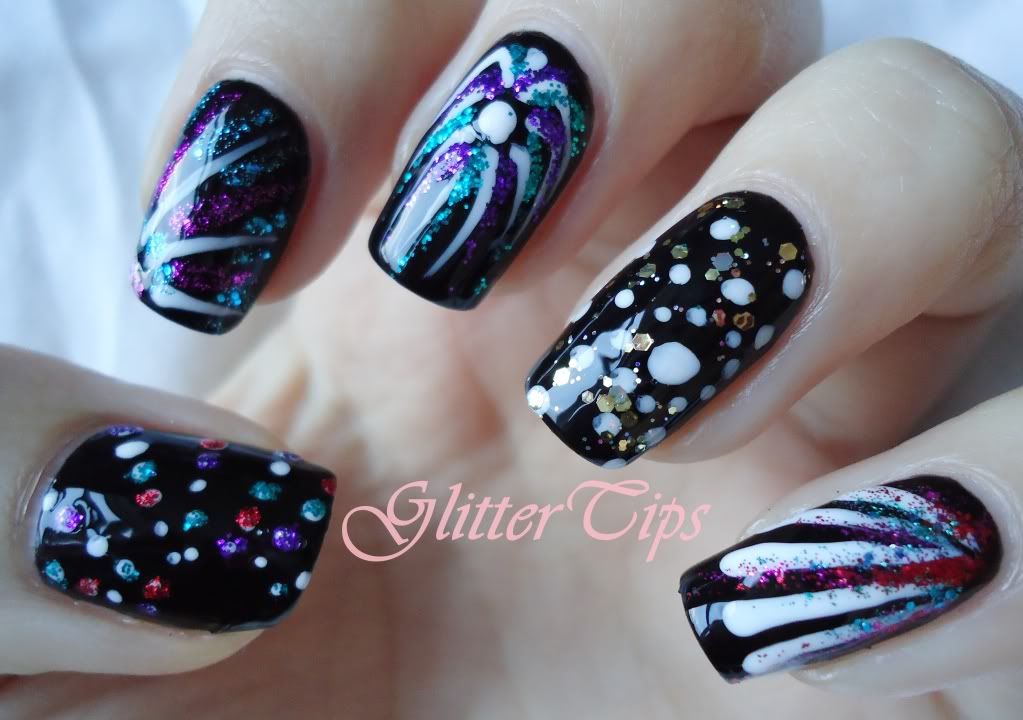
Todays challenge was Fireworks/Bonfire Night Nails and I went for fireworks.


For this I used two coats of Barry M Black as a base, then used Barry M Matt White to do the basic firework shapes. Then I added some glitters for sparkle, shame them weathers too dull to capture it!
The glitters I used were Models Own Purple Haze, Emerald City and Barry M Yellow Topaz, Magenta Glitter, Green Glitter, Red Glitter and Aqua Glitter.

Next up is Fairy Tale!

♥ A ♥

Friday, 23 November 2012

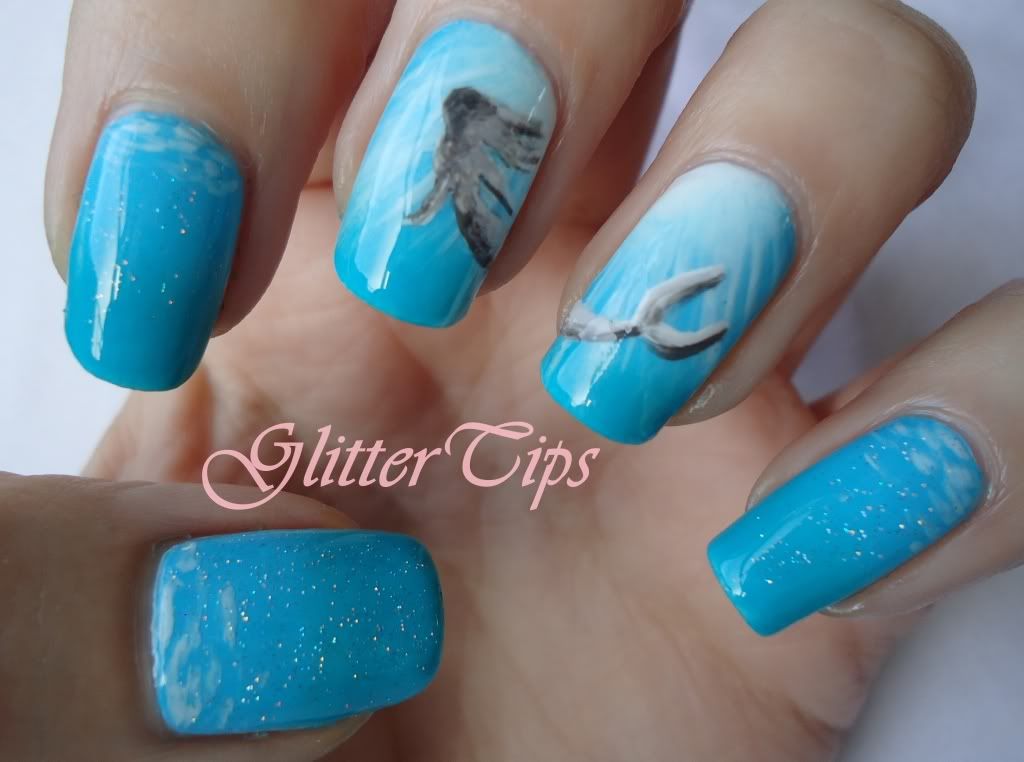
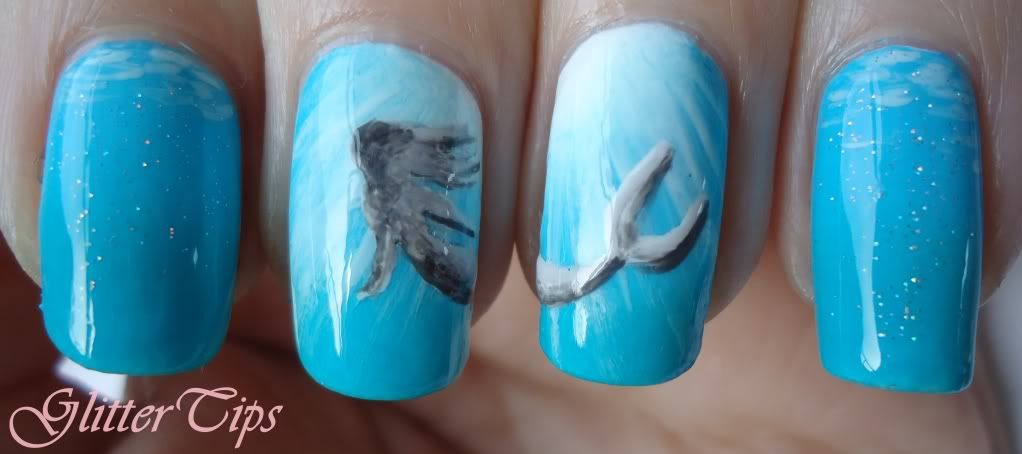
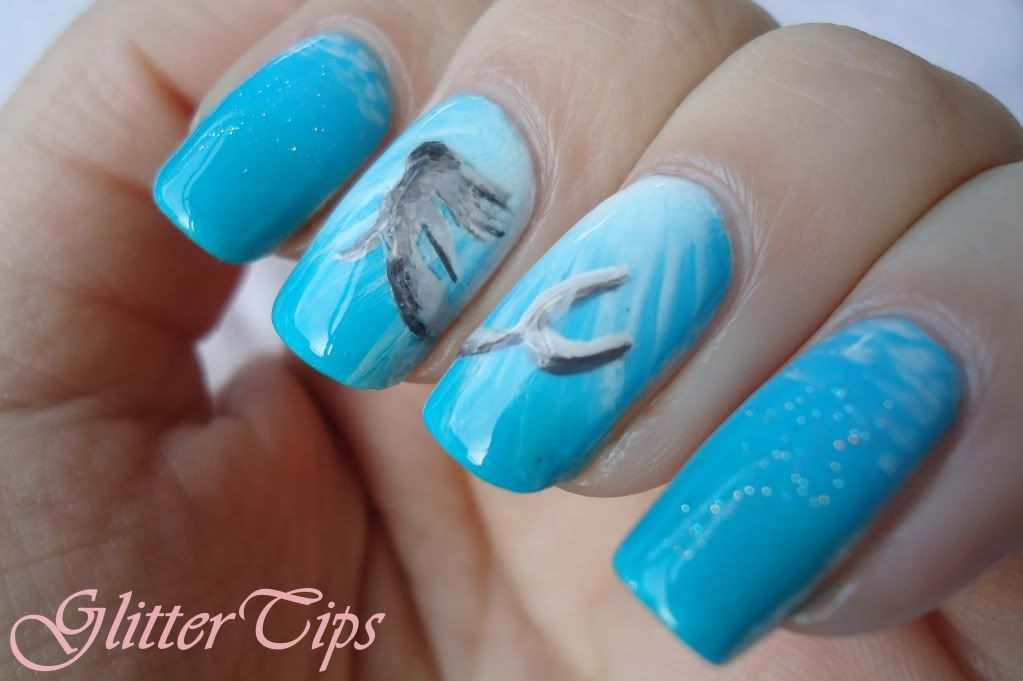
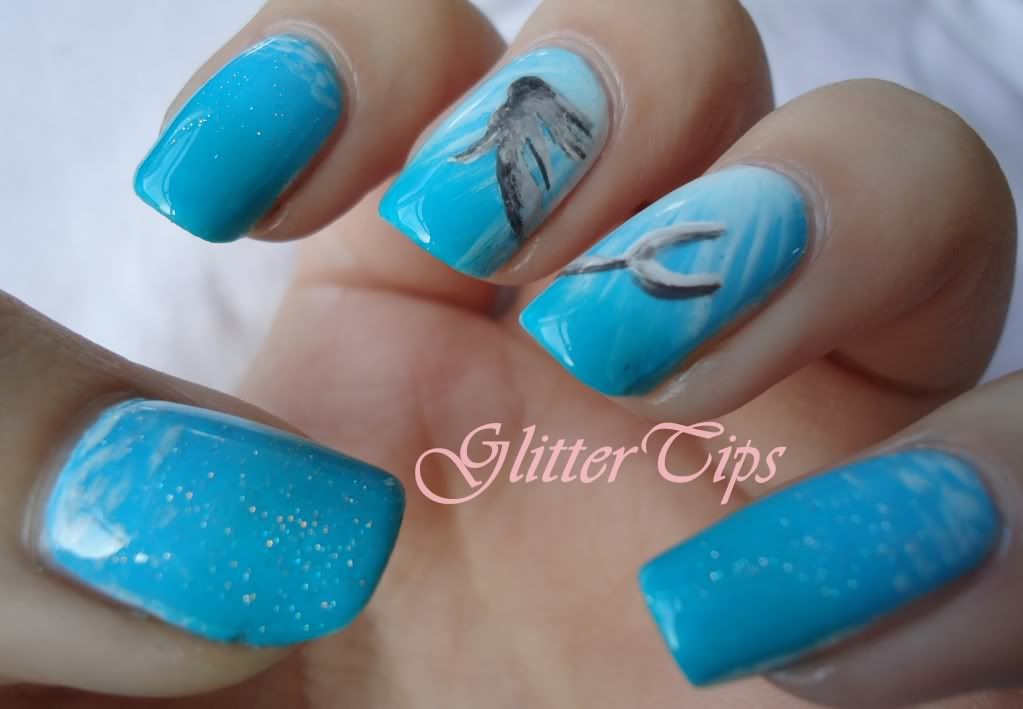
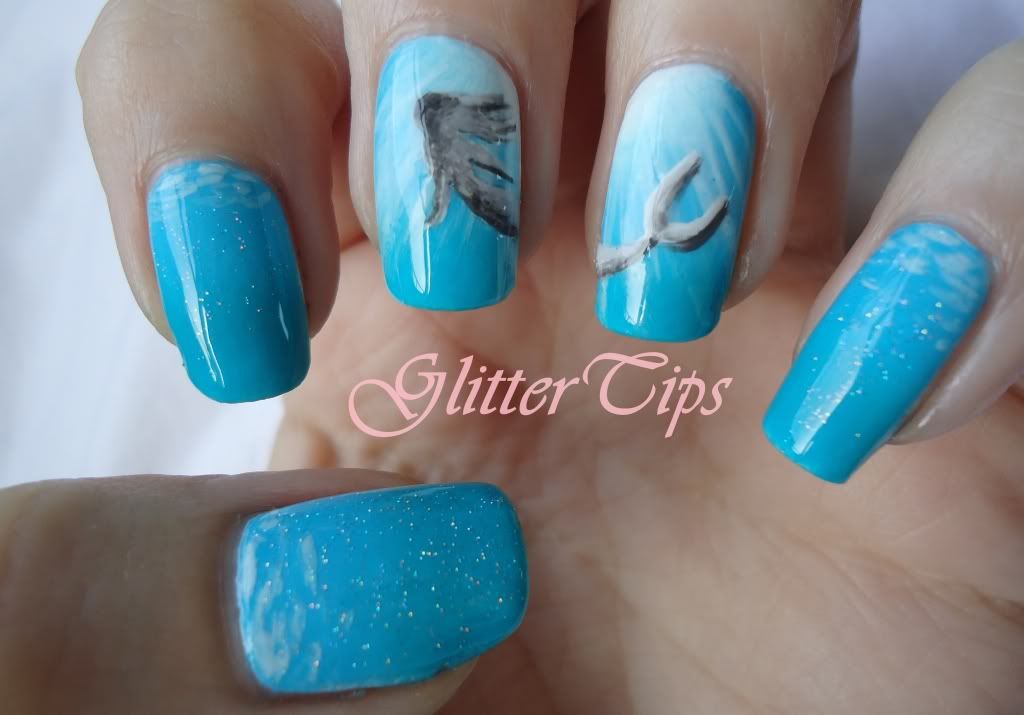
Lazy 15 Nail Challenge - Day 10 Underwater Creatures/Mythical Water Creatures

Today is day 10 of the Lazy 15 Challenge and the theme is Underwater/Mythical Underwater Creatures.
I knew as soon as I saw it I was going to do mermaid nails. I toyed with the idea of octopus/kracken nails, but I just kept coming back to mermaids.


I wanted to give the effect of looking up from under the water at the mermaid against the light, as if she was spotted by some scuba divers or something. I'm fairly certain I'm not describing it very well but hopefully you catch my drift!

I started by applying a gradient over a base of Barry M Matt White.
For the gradient I used a piece of kitchen sponge as usual. On the ring and middle fingers I added Barry M Matt White to the top right/left corners then Barry M Pure Turquoise and Rimmel London 60 Second Nail Polish in Sky High which is a bright teal.
On the pinky, index and thumb I just did a normal gradient of the Pure Turquoise and Sky High.
When that had dried, I mixed a little Pure Turquoise and Matt White and used it on the two middle fingers lightly with a bit of acetone to make the lights rays coming through the water, then roughly at the top of the other three nails to look like light reflecting off the surface of the water.
Next I did the shape of the mermaid in Matt White, then mixed Matt White, Grey and Black, all by Barry M, to do the shading.
To finish I used China Glaze Fairy Dust on the pinky, index and thumb for a little sparkle then topcoated with Seche Vite.

Unfortunately the greeny teal shade of Sky High doesn't show up in the photos, which is a pain as it gives a bit of depth. But other than that I am in love with this one, I'd totally keep it on all weekend if I wasn't going out tomorrow evening!

Hope you all have a fab weekend!

♥ A ♥

Tuesday, 20 November 2012

Lazy 15 Challenge - Day 8 Dessert

I'm posting late again!
I have a really good excuse this time which I will show you at the end of the post!
But for now, straight to the nails.

The theme for Day 8 was Dessert. I had lots of ideas for this theme but only one that I really really wanted to do, and that was Ice Cream Sundae nails!


I mixed Barry M Matt White and a tiny bit of Lemon Ice Cream for the base colour and painted it on using a nail art brush. Then I used Barry M Blueberry Ice cream mixed with Matt White for the sundae bowls, Matt white for the scoop of Ice Cream, OPI Suzi Loves Cowboys for the chocolate sauce, Barry M Raspberry for the raspberry sauce and a mix of Barry M Yellow, Block Orange and Famous By Sue Moxley Nude for the toffee sauce. For the Cherries I used Barry M Bright Red and Spring Green and for the sprinkles I used Barry M Lemon Ice Cream, Blueberry Ice Cream, Mint Green, Strawberry Ice Cream and Matt White.

I love how cute these turned out, I just wish I hadn't forgotten to add the wafers! I was very sleepy though as at 5.30am Monday morning our Tiffy cat decided to wake us up with this...


!!!
We had no idea she was even pregnant!
She did have another but unfortunately he/she didn't make it :-(.
Other than that both Tiff and the kitten are doing really well!
I think the kitten looks like a little badger at the moment however MrGT tells me that those stripes are actually an Assassins Creed symbol and has named he/she Ezio.
Now if that's not a good enough reason for posting late I don't know what is.

Fingers crossed tomorrows post is up on time because tomorrows theme is Disney Movies/Characters and possibly the theme I have looked forward to the most!

♥ A ♥

Tuesday, 6 November 2012

Polish Days - MANicure

It's Polish Days time again and Novembers theme is MAN-icure.
I'm sure you are all aware by now about Movember. But just in case you are not, each November men all over the UK sport a moustache for the duration of the month to raise funds and awareness for men's health, specifically prostate cancer and testicular cancer.
Obviously this is a bit tricky for us ladies but we can show our support in other ways.
Such as on our nails!
For this months theme we were given the choice to go with the Movember moustache or a tribute to an important man in our lives, I had a choice of five men, and I chose them all!


The thumb is a computer circuit board to represent my Dad who works with computers, don't ask me what he does because I have no idea! I'm just going to call it magic!

The index finger is and Xbox symbol to represent MrGT. Yep, I am an Xbox widow.

The middle finger is lots of little toy cars to represent my four year old son, he is, as most four year old boys are, completely car mad.

The ring finger is an anchor to represent my father in law who is ex-navy.

And lastly the pinky is tartan to represent MrGTs Grandad who is Scottish and proud!

I used lots of polishes for this so I will try my best to list them all for you.
Thumb - Base No7 Totally Teal. Lines Barry M Mint Green. Dots Barry M Black.
Index - Base Nails Inc Charlotte Street. The X is a mix of Barry M Yellow, Mint Green and Spring Green. The Highlight is a mix of Barry M Matt White and Nails Inc Charlotte Street.
Middle - Base Barry M Matt White, Cars Barry M Bright Red, Spring Green, Yellow, Cobalt Blue. Wheels Barry M Black and Silver Foil.
Ring - Base Barry M Cobalt Blue. Anchor mix of Barry M Silver Foil and Black.
Pinky - Base Barry M Bright Red. Stripes Barry M Spring Green, Yellow and Matt White.

This was done in a bit of a mad rush so I could get the photos taken before we lost the natural light, so it'd not as neat as I would like but I'm still incredibly pleased with it and very proud to be wearing it!

♥ A ♥


LinkWithin

Related Posts Plugin for WordPress, Blogger...