Sunday 30 December 2012

My Top 12 of 2012

Hello!
I hope everyone has had a lovely few weeks? I'm very apologetic for not being around much throughout December. It is a month jam packed with shopping, birthdays, school events, and all the usual festivities for the time of year. We have been a very busy household indeed!

I have still been doing my nails and taking photos so I have plenty of posts to be writing however I really wanted to do at least one post this month that was relevant to the time of year. 
I have been loving all the 'Top 10/12/15/20/200 of the year' type posts that have been popping up recently so I decided to go back through some of my older posts and pick my Top 10 nail art posts.
But I couldn't.
So I went with 12!
And here they are in chronological order.


I think this might be my most popular blog post! I loved these nails so much, and it was my first freehand attempt at anything other than polka dots or zebra stripes.
I was very proud.


These were my Day 9 post for the 31 Day Nail Challenge which I have still yet to complete!
I just loved how cute and cheerful they were and the best part...


I did Mum/Daughter matching nails!


These were my first ever galaxy nails and I did them for the Makeup Savvy 15 Day Nail Challenge which I loved every moment of!


These were another Makeup Savvy Challenge entry.
I really loved how delicate these turned out, the black and gold leaf pattern was added last minute as I thought it needed something extra.


Another Makeup Savvy challenge entry!
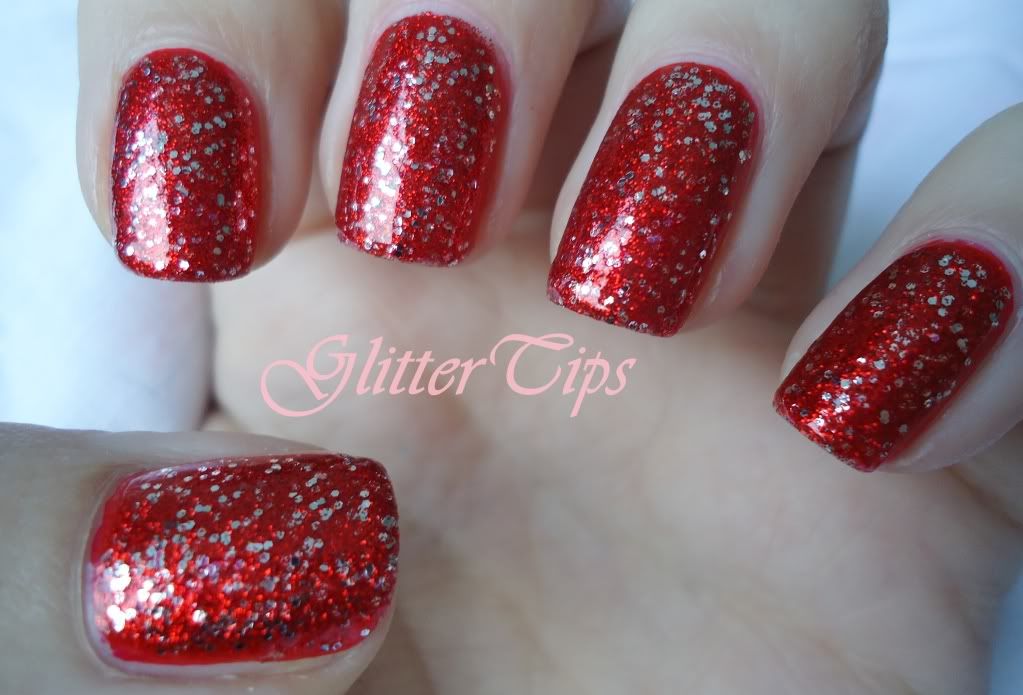
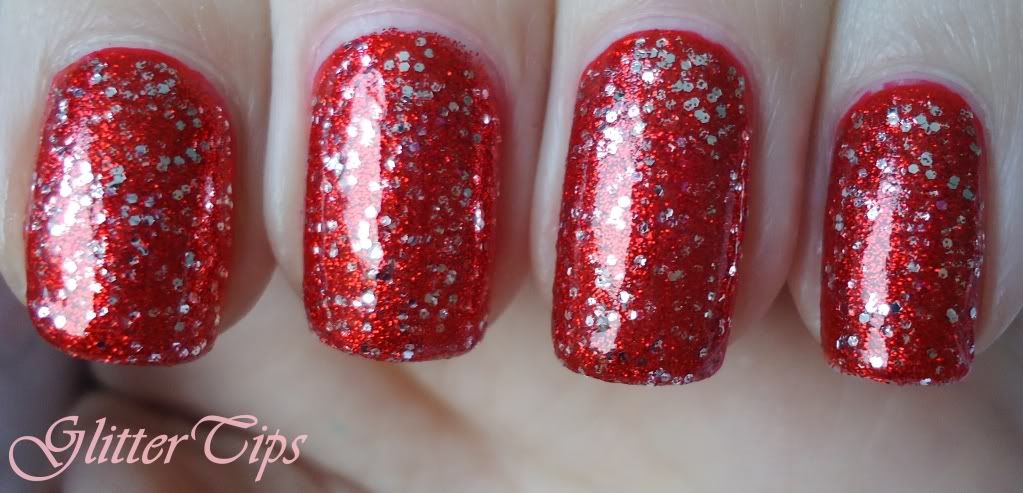
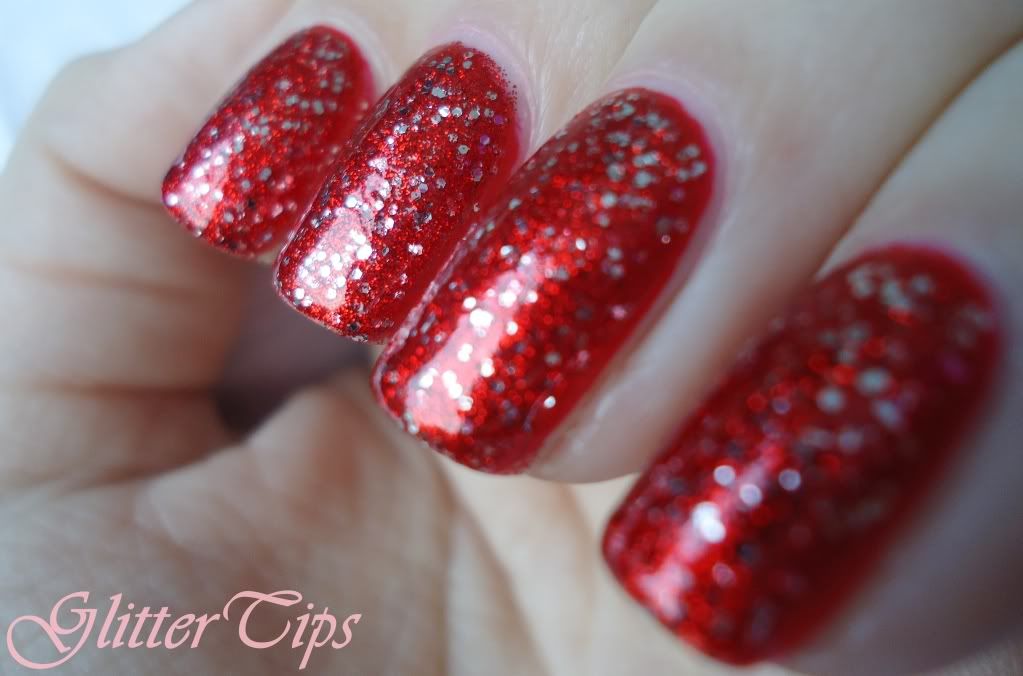
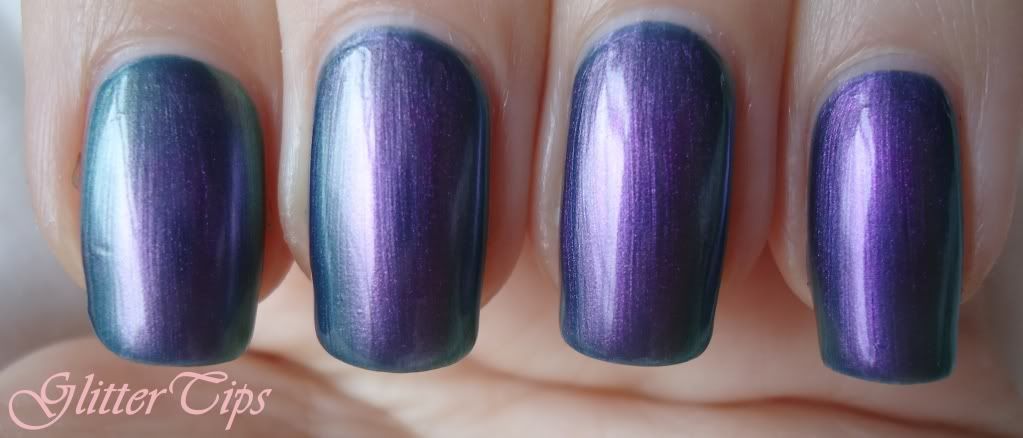
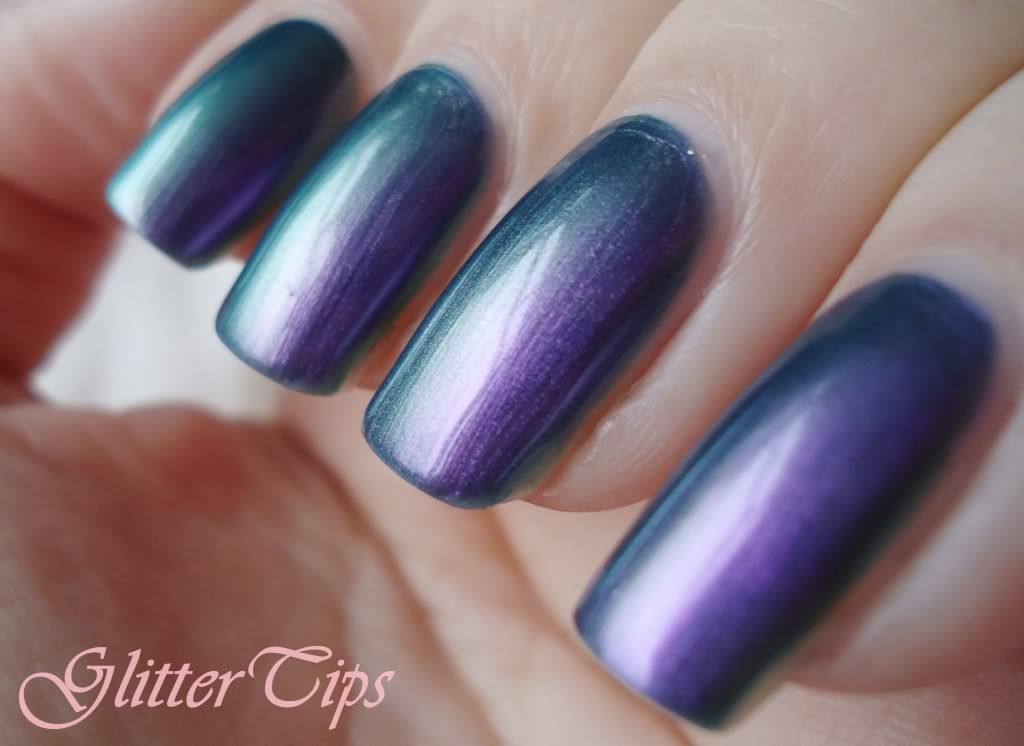
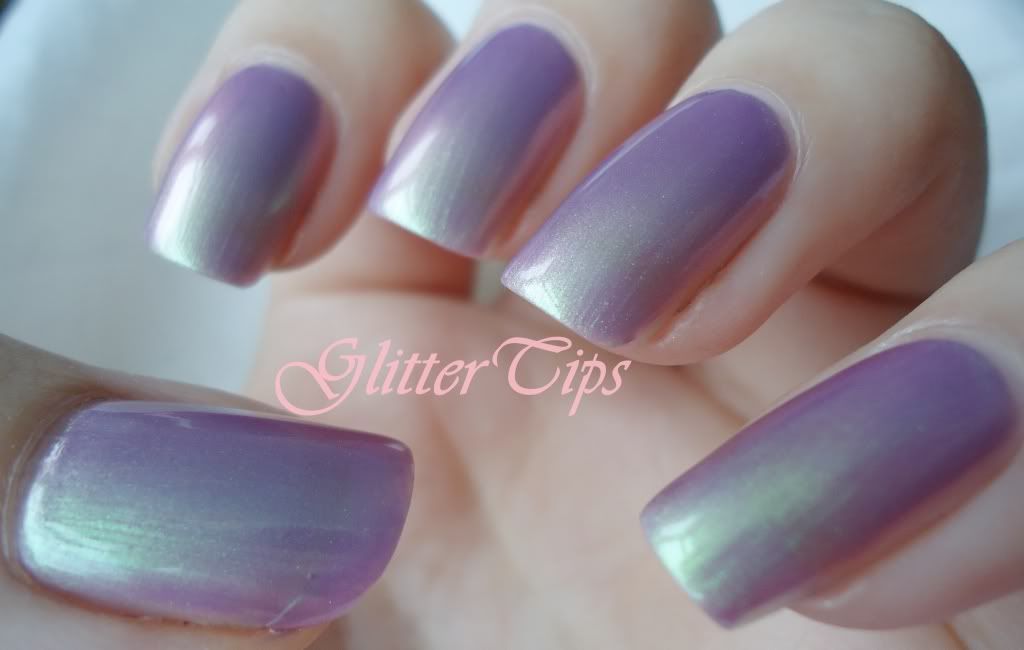
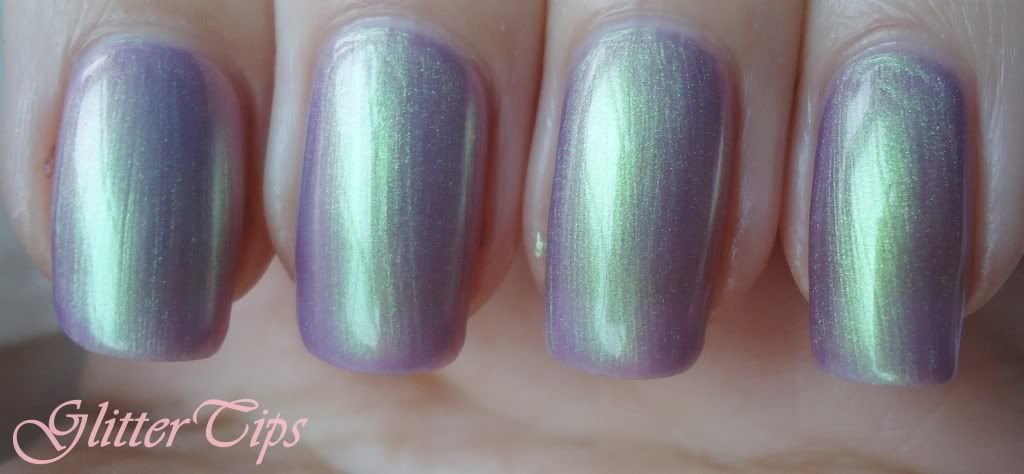
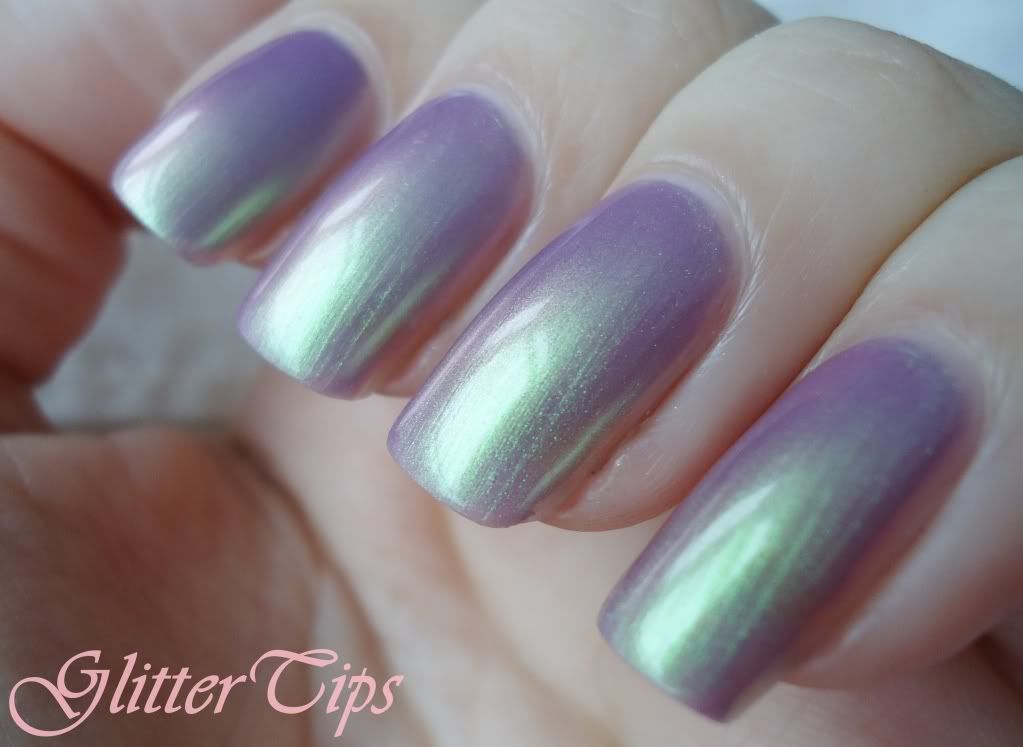
This is another of my most popular posts, I love how gorgeous the colours are together and how soft it looks. I added the glitter topcoat to cover a teeny tiny bit of dust that got stuck on one of my nails, it wasn't visible in person but the camera picked it up in my first batch of photos so out came the glitter and  luckily I loved it even more!


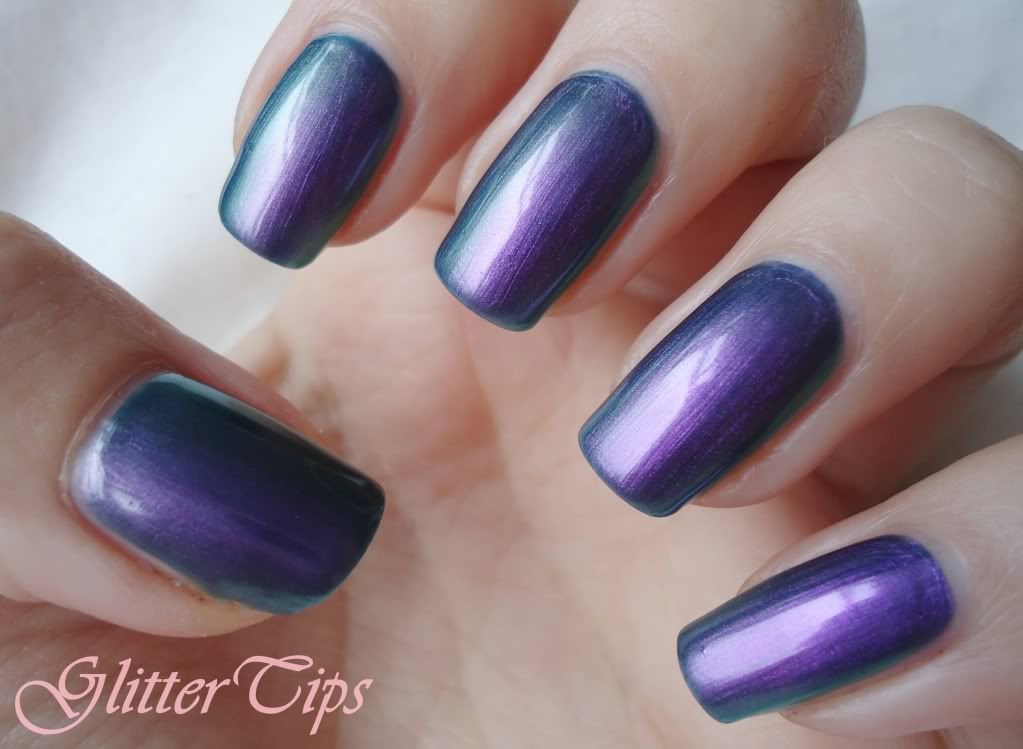
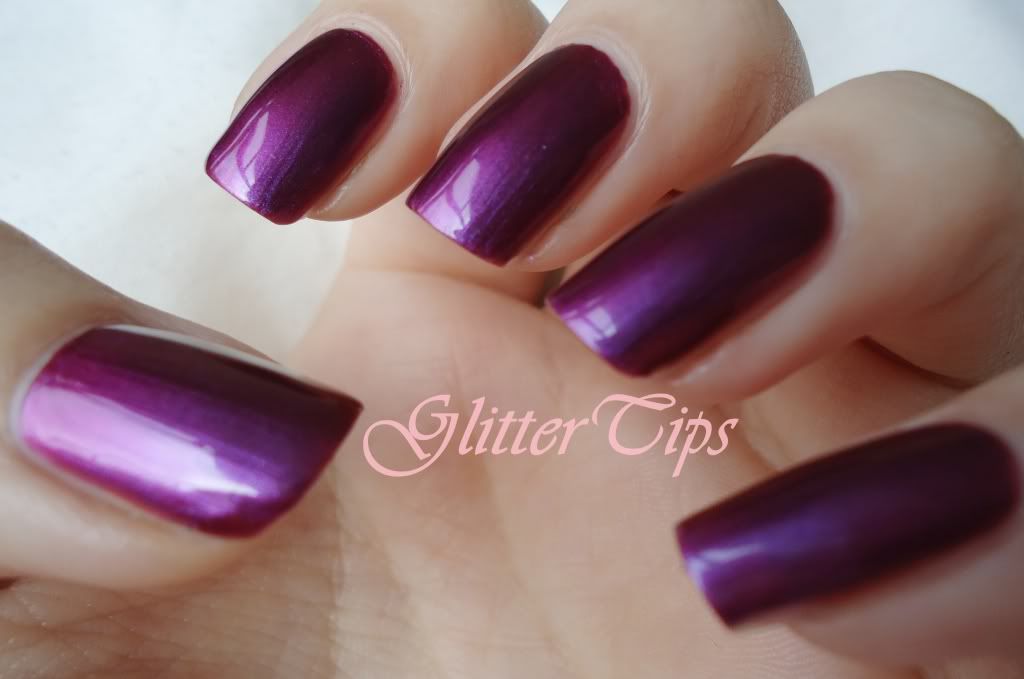
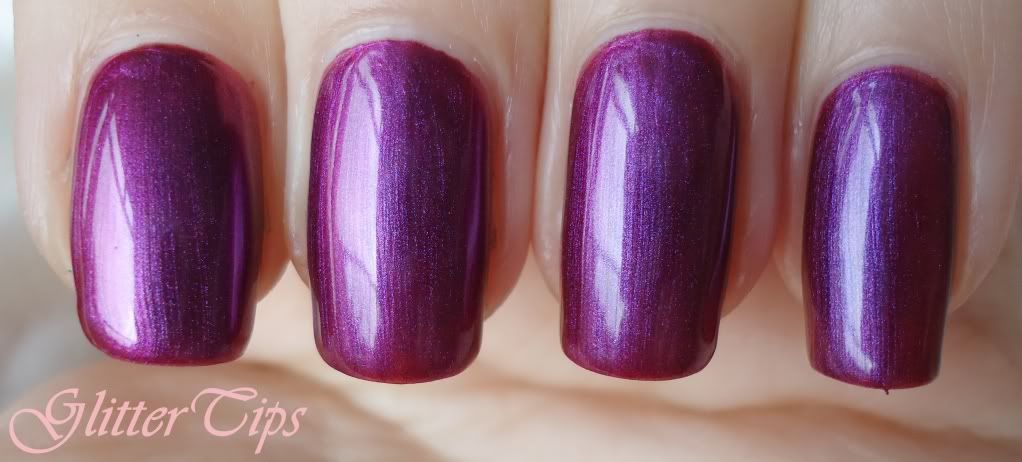
These had to be in here somewhere!
These were picked as one of Fee from Makeup Savvy's three favourites of the 15 Day Challenge.
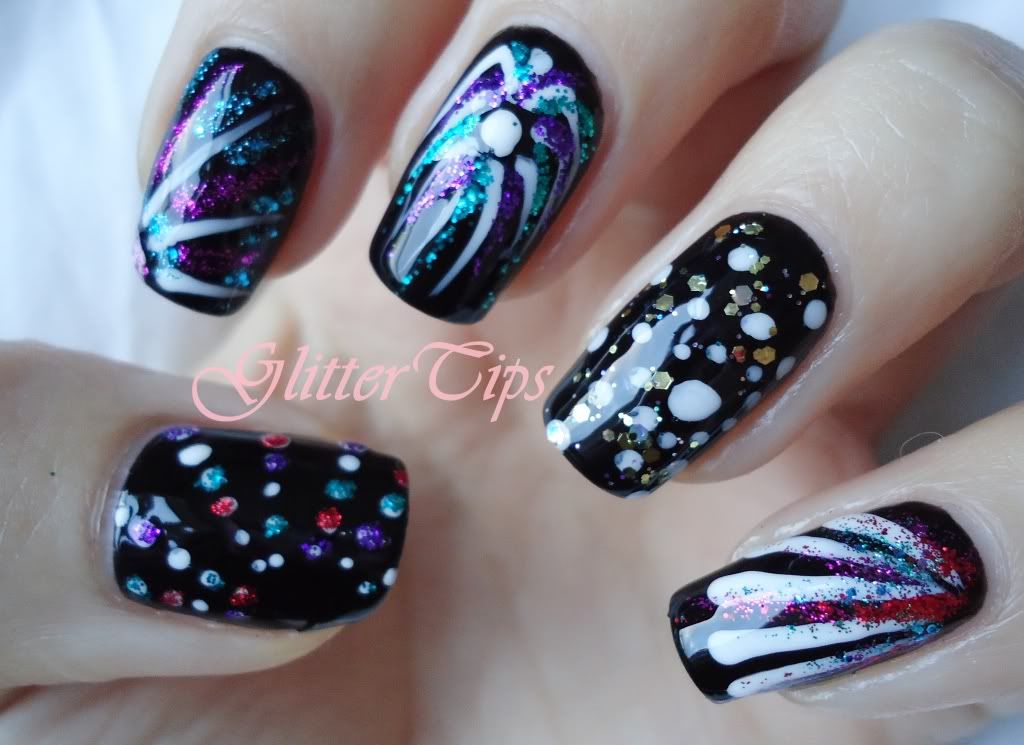
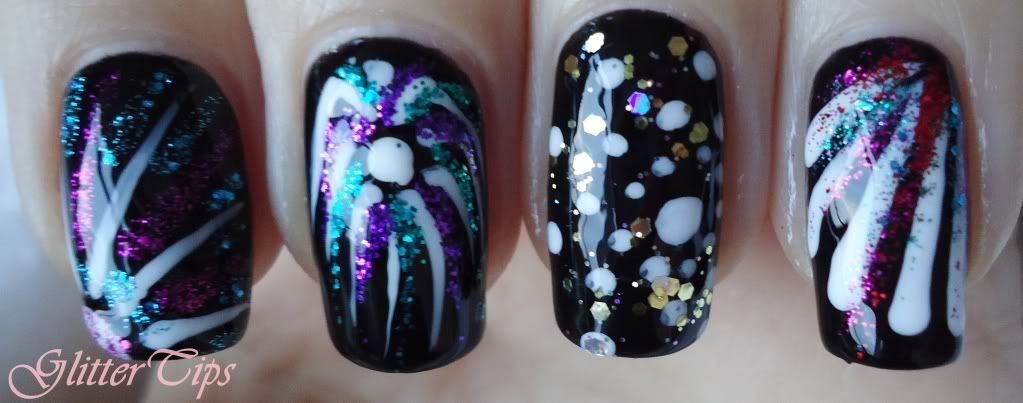
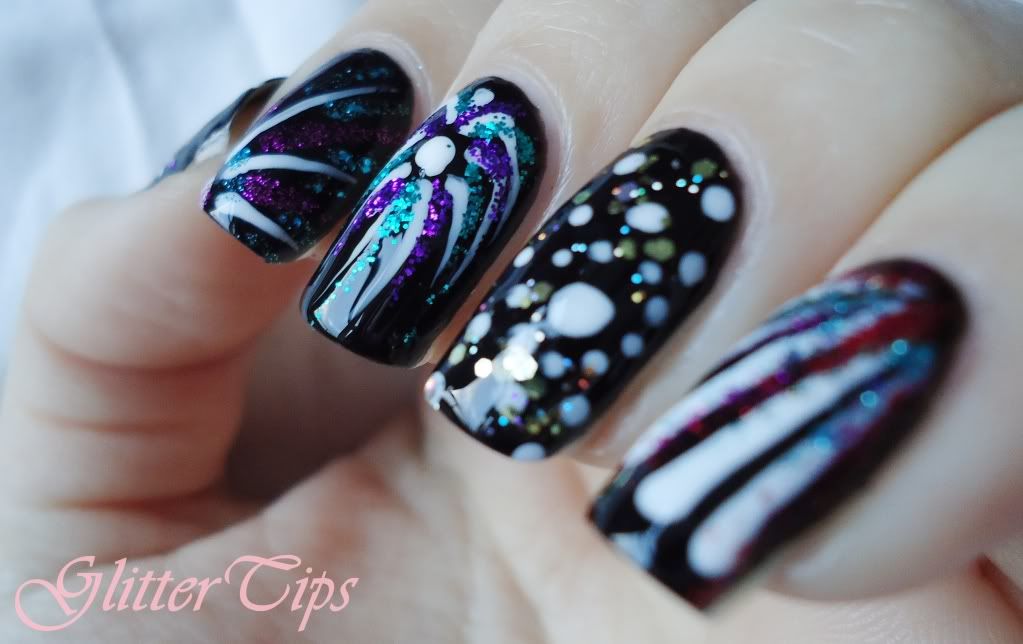
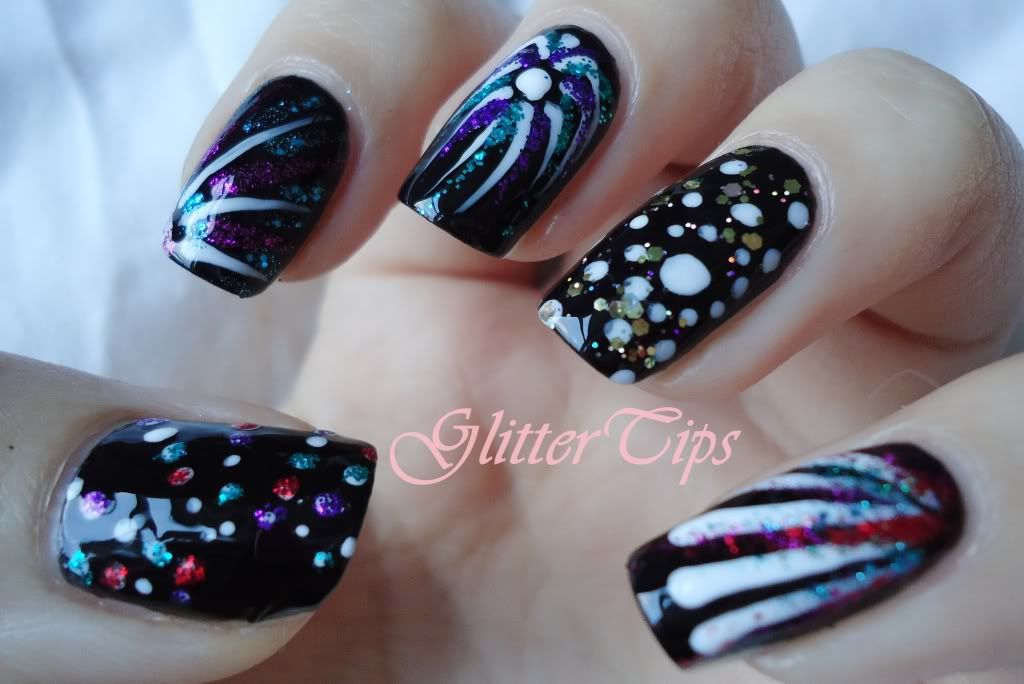
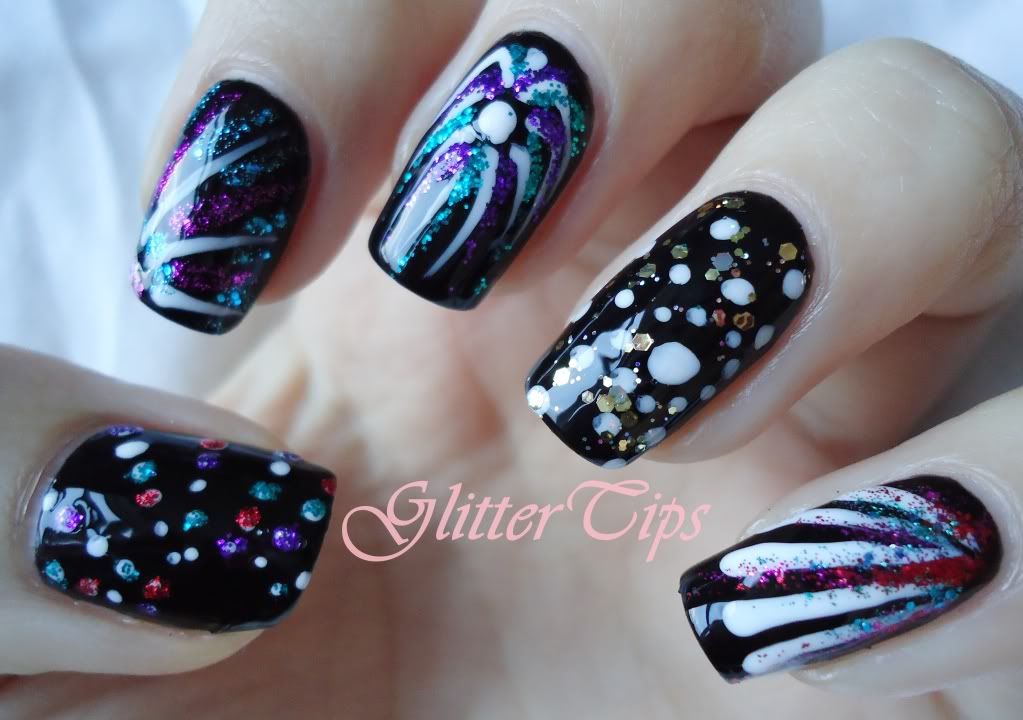
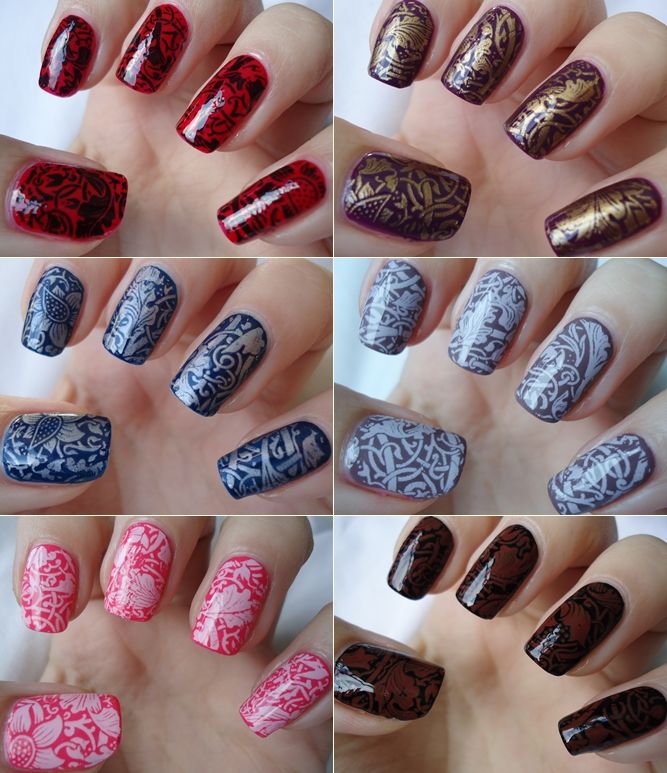
These took me hours! I'd never attempted anything like this before but after seeing Robin Moses' Tangled Nails I really wanted to recreate them. I used nail polish as I don't own any acrylic paints and just kept going and adding bits here and there until I was happy with them. My neck ached so much the next day from being sat tensed up with concentration for such a long time! But the outcome was worth it and I was so thrilled they were picked as a favourite.


These were my personal favourite nails of the 15 Day Challenge and possibly even my favourite nail art I've done to date. They were inspired by Ed Hardy tattoo style designs and my love for anything with skulls on it, especially jewellery.


I don't think I really need to explain why these are a favourite of mine!
My gorgeous cats on my nails, what more could I want?
I think I might have to do some Pug nails soon though!


These were just so simple and cute they had to be in my favourites, plus they were for a very special week which included my daughters first day at a new school in year 1 and my sons first day at school!


These were a Lazy 15 Challenge post and my first successful water marble using normal nail polish.
I couldn't have been happier with the result it gave, the China Glaze Bohemian Collection is just gorgeous!


These were not to everyones taste but I loved them.
They were inspired by the inside of a storage box that my Mum has. I really enjoyed using the different techniques to achieve the final look, it was time consuming but very satisfying.


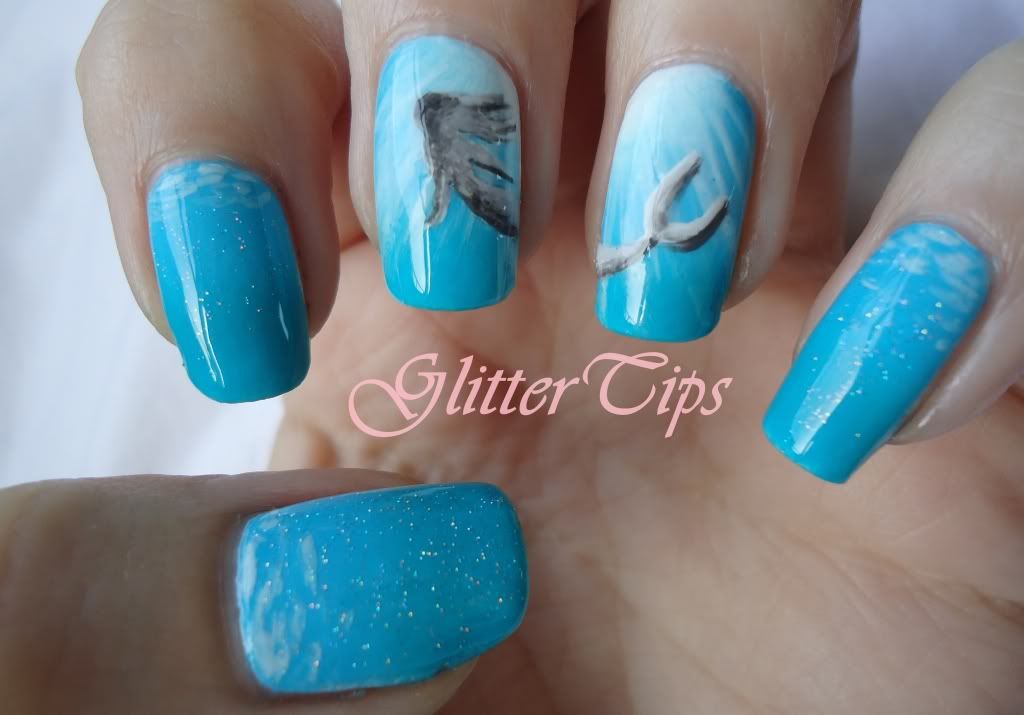
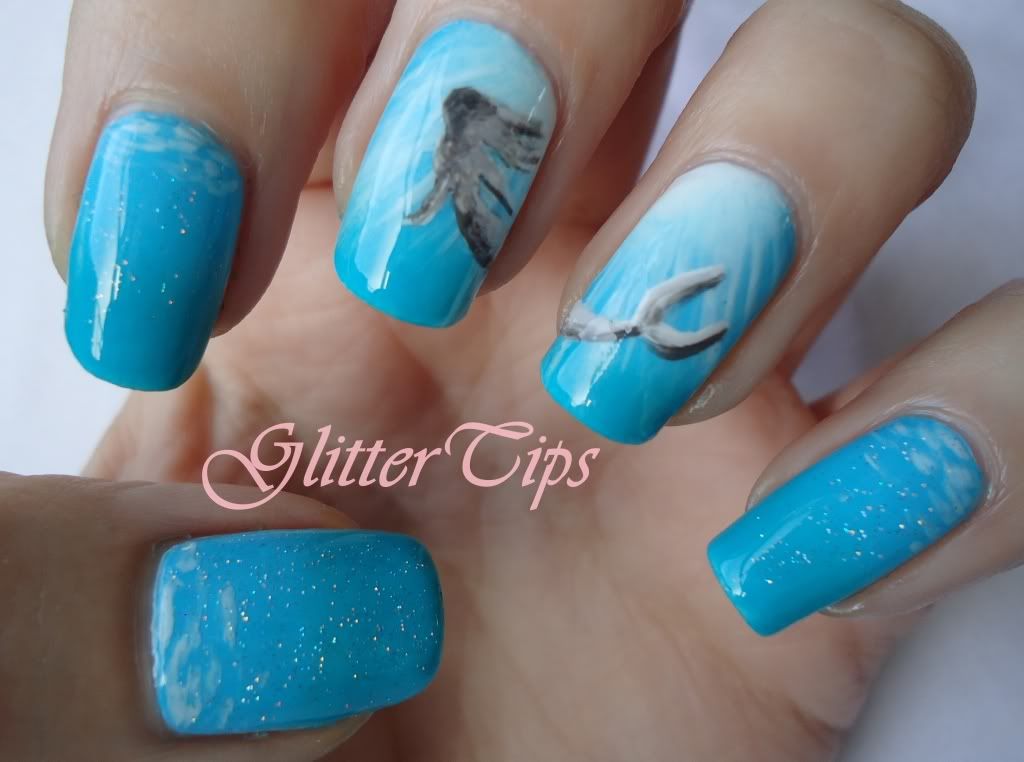
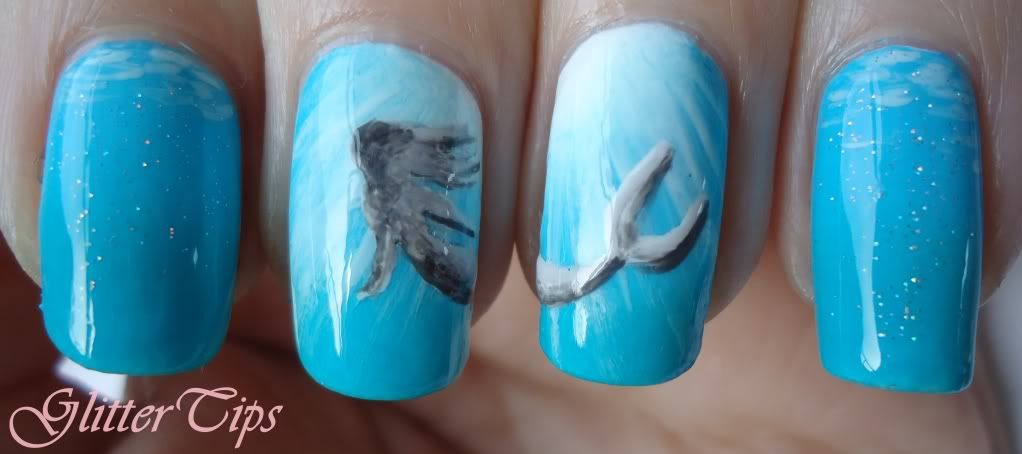
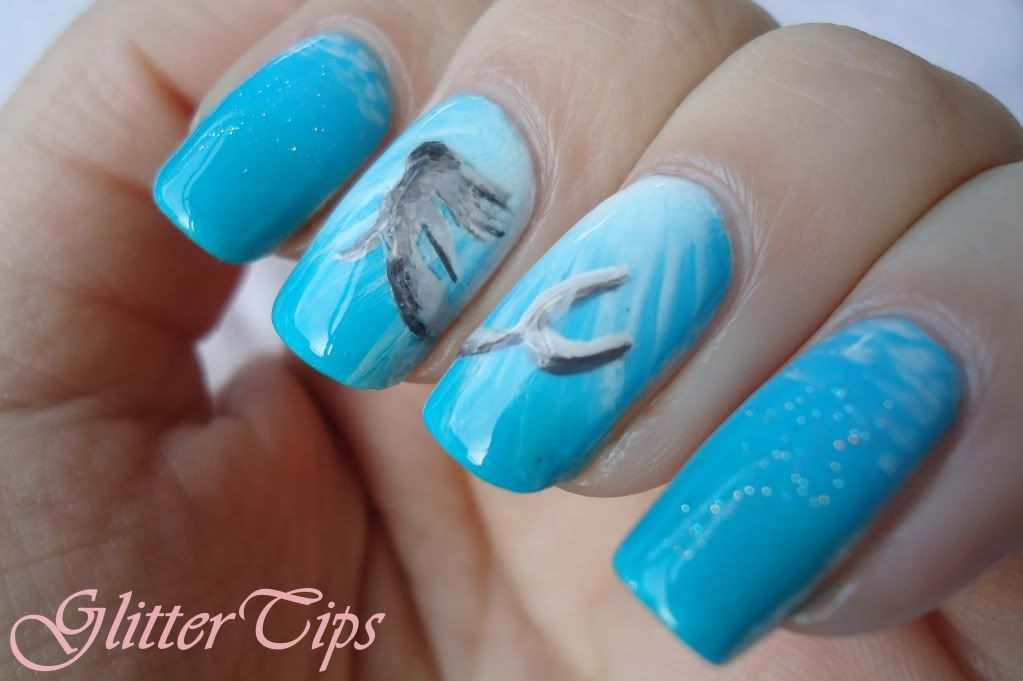
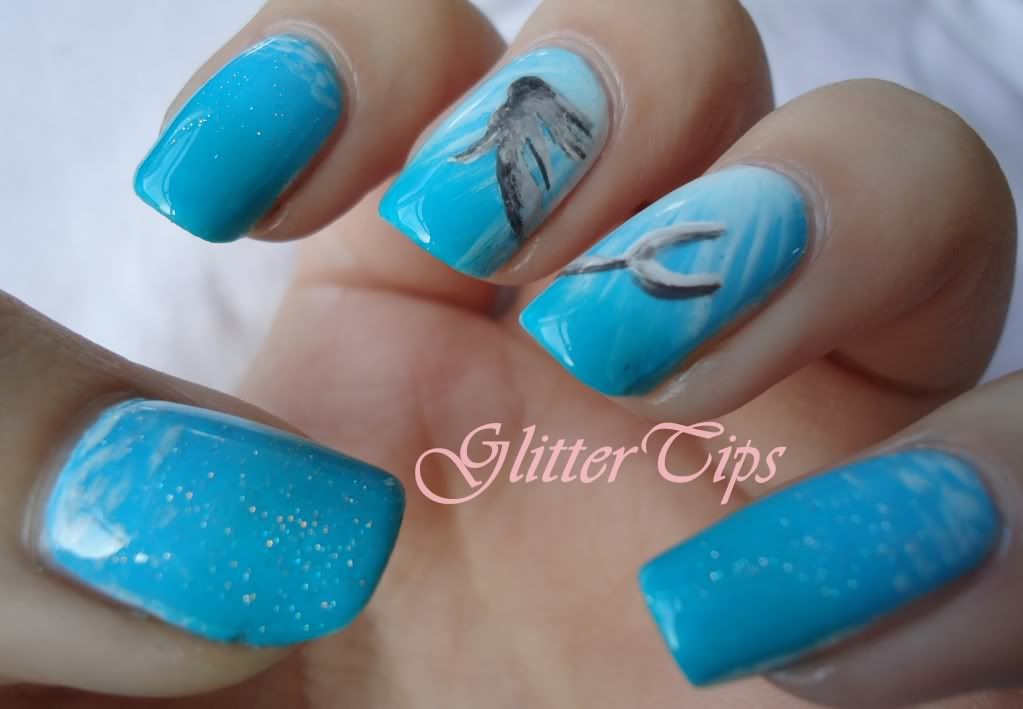
Last but not least, mermaid nails.
When I asked my daughter which were her favourite nails she immediately said the mermaid ones! I really thought she would have picked one of the Disney Princesses but these were her favourites and they were one of mine too, so here they are!

And there you have my Top 12 of 2012.
I hope everyone has a very happy new year!

♥ A ♥

Monday 10 December 2012

Rimmel London - 'Precious Stones' Collection Review & Swatches

Last week I showed you Rimmels new 'Metal Rush' collection and today I have two of their new 'Precious Stones' glitter polishes.
Precious Stones consists of two high coverage glitter nail polishes named Ruby Crush and Diamond Dust.

001 Diamond Dust.


High coverage is no joke! This is two coats with no 'underwear' other than a base coat!
Diamond Dust is a gunmetal grey with plenty of holo glitter for sparkle. It applied evenly without a hitch and dried to a slightly matte affect, which looked amazing for those who like their glitters slightly more muted but I like my glitters to really twinkle, so the photos show it with a coat of Seche Vite.
I wore this for a night out and I'm sad to say it did not last the night, I looked down at one point to find one nail on each hand had come off in one big chunk and several other nails were chipped. It's not like my nights out are of the wild variety either, a few drinks, a bit of chatter, then maybe some dancing towards the end of the night, so I saw no reason for whole nails to chip off.
For me however, this is not too much of a disaster as I very rarely wear a polish longer than a day anyway. But if you like yours to last at least the week or possibly more, you may want to consider wearing a polish underneath as 'underwear' and be prepared to touch up the tips.
At least that's one of the perks of a glitter polish, easy touch ups!
I still love this polish and will get a lot of wear out of it simply because I adore the coverage, colour and the sparkle! It's an eye catcher for sure!

002 Ruby Crush.


Ruby Crush is a mix of fine red glitter and larger silver glitter particles.
Maybe it's just the time of year, but this polish feels really, very festive to me!
I applied two coats over a coat of Barry M Bright Red and then added a coat of Seche Vite in an attempt to avoid the chipping I had with Diamond Dust. Obviously, with it being a different polish, having not tried Diamond Dust with 'underwear' or Ruby Crush without, and the fact that I didn't wear Ruby Crush on a night out, I can't say for certain that this has solved the massive chipping I had with Diamond Dust but it has lasted longer. So far it has lasted a whole day, which has consisted of housework, playing with puppy, decorating a Christmas tree, showering, cooking and the kids swimming lessons. I've touched up some tip wear but that's it.
Again it applied evenly, if not maybe slightly sparser than Diamond Dust (but maybe that's just me) and dried to a Matte finish, though with a coat of topcoat it is a mass of sparkly festive goodness!

Both are available to buy online or in store at Boots and Superdrug for £3.99.

Has anyone else tried these out? If so did you have the same issues as I did with the chipping?

♥ A ♥


Friday 7 December 2012

Rimmel London - 'Metal Rush' Collection Swatches & Review

Happy Friday!
I'm back blogging today after a little while off, the entire household came down with a sickness bug one by one, meaning the kids were off school and we were all left feeling pretty tired and rotten!
I failed the last few days of the Lazy 15 Challenge, missed Polish Days and the start of another challenge I was going to do in December due to being unwell, which is very annoying but couldn't be helped.
Also it was MrGT's birthday on Tuesday and it's two weeks today until mine so we have have a busy couple of weeks coming up!

Today I thought I'd just ease myself back in with some swatches of Rimmel Londons Metal Rush Collection.
There are four different shades, Royal Blue, Gold Save The Queen, Purple Reign and Pearly Queen.
Rimmel say that they use 'Unique metallic nail technology that changes tone with your moves' which I think is a rather long winded way to say 'Duo-chrome'!

60 Royal Blue.


Royal Blue is a mid blue metallic with a purple duo chrome shift. It has a slight teal in it too which is very apparent in the bottle but I didn't expect to translate to the nail, it did though making it a very beautiful colour! 
The photos show two coats with no topcoat.

80 Purple Reign.


Purple Reign is a really stunning purple with a pinky orange duo chrome and a slight blue shimmer. It's so deep, rich and glossy looking, I'm in love with it! It is by far my favourite of the four, and again this is two coats, no topcoat.

70 Gold Save The Queen.


Gold Save The Queen is a tricky one for me, the paler gold/green shift does not suit my skin tone, but the gold/copper shift does. I think for me this one will have to be worn in the summer when I have a little more colour, but the polish itself is so pretty and unlike anything else in my collection!
Once again this was two coats and no topcoat.

100 Pearly Queen.


Pearly Queen is a pinky lilac shade with a gorgeous pale green/gold duo chrome, it is a princess polish as my five year old daughter told me! This was the only one that required three coats due to being slightly on the sheerer side than the others. I think this is one I will be experimenting with layering over darker polishes, I'm hoping it might lead to some pretty combinations!

All in all I was really impressed with the Metal Rush polishes.
There is nothing more disappointing than a duo chrome that looks stunning in the bottle but the beauty doesn't translate to the nail. With these what you see is pretty much what you get and they apply so smoothly, you can see brush lines but with careful application it's no problem.

I bought mine from ASOS when they were on offer, but they can also be purchased from Boots and Superdrug online or in store for £3.99 and from what I can see online they are on 3 for 2 at the moment!

I hope you all enjoy your weekends!
I will be spending mine playing catch up with blog posts!

♥ A ♥

Monday 26 November 2012

Lazy 15 Nail Challenge - Day 11 Fireworks/Bonfire Night Nails

Just a quick one today as I have a poorly little boy off school today!

Todays challenge was Fireworks/Bonfire Night Nails and I went for fireworks.


For this I used two coats of Barry M Black as a base, then used Barry M Matt White to do the basic firework shapes. Then I added some glitters for sparkle, shame them weathers too dull to capture it!
The glitters I used were Models Own Purple Haze, Emerald City and Barry M Yellow Topaz, Magenta Glitter, Green Glitter, Red Glitter and Aqua Glitter.

Next up is Fairy Tale!

♥ A ♥

Friday 23 November 2012

Lazy 15 Nail Challenge - Day 10 Underwater Creatures/Mythical Water Creatures

Today is day 10 of the Lazy 15 Challenge and the theme is Underwater/Mythical Underwater Creatures.
I knew as soon as I saw it I was going to do mermaid nails. I toyed with the idea of octopus/kracken nails, but I just kept coming back to mermaids.


I wanted to give the effect of looking up from under the water at the mermaid against the light, as if she was spotted by some scuba divers or something. I'm fairly certain I'm not describing it very well but hopefully you catch my drift!

I started by applying a gradient over a base of Barry M Matt White.
For the gradient I used a piece of kitchen sponge as usual. On the ring and middle fingers I added Barry M Matt White to the top right/left corners then Barry M Pure Turquoise and Rimmel London 60 Second Nail Polish in Sky High which is a bright teal.
On the pinky, index and thumb I just did a normal gradient of the Pure Turquoise and Sky High.
When that had dried, I mixed a little Pure Turquoise and Matt White and used it on the two middle fingers lightly with a bit of acetone to make the lights rays coming through the water, then roughly at the top of the other three nails to look like light reflecting off the surface of the water.
Next I did the shape of the mermaid in Matt White, then mixed Matt White, Grey and Black, all by Barry M, to do the shading.
To finish I used China Glaze Fairy Dust on the pinky, index and thumb for a little sparkle then topcoated with Seche Vite.

Unfortunately the greeny teal shade of Sky High doesn't show up in the photos, which is a pain as it gives a bit of depth. But other than that I am in love with this one, I'd totally keep it on all weekend if I wasn't going out tomorrow evening!

Hope you all have a fab weekend!

♥ A ♥

Thursday 22 November 2012

Rio Beauty - Lace Nail Foils Kit Review

A couple of weeks ago I was very kindly sent another one of the Rio Beauty Nail Art Sets to review.
This time I was sent the gorgeous Lace Nail Foils which I have been having a lot of fun with!


The kit comes in a little black case which contains- 

1 x 8ml bottle of Foil Adhesive.
1 x 8ml bottle of 2 in 1 Varnish.
1 x 14ml bottle of Red Nail Polish.
6 x rolls of Lace Nail Foils in the colours Black, White, Gold, Silver, Red and Pale Pink.
Application stick.
Design Chart.
Instructions.


They are really very simple to apply and the instructions are clear and easy to follow.
First of all you need to cut the foil into little strips wide enough to cover your nail.
Then apply your chosen nail polish to clean, dry nails and leave to dry for at least 30 mins.
Next apply the adhesive, and wait for 10 mins.
Place the foil strip over your nail and use the application stick or a cotton bud to rub over the foil to ensure it sticks and to smooth out any creases.
Gently peel the foil off and seal with 2 in 1 Varnish, remembering to cap the free edge.

A few problems that I did come across were- 
The pattern not sticking in places, which is easily fixed by just reapplying the adhesive and patching it up.
 Creasing was a bit of a problem but I wouldn't say that was the kits fault, I do have rather curved nail beds making creases inevitable and it is only noticeable if you are really looking at them. 
Sometimes my base colour peeled off, but that was my own fault by trying to guess how long the nail polish was drying for and applying the foils way too early, the obvious way to avoid this is to actually pay attention to the time when applying and make sure you wait the 30 mins for the nail polish to dry, possibly a little longer, and the 10 mins for the adhesive to dry. Once I started paying attention rather than guessing the application was easy peasy!
Wear an tear was a bit of a problem too, the 2 in 1 Varnish is not going keep these looking good much longer than a day, you need to apply a harder wearing top coat after the 2 in 1 Varnish to protect them. If you want them to last a week or more I'd advise reapplying your topcoat every couple of days and make sure you cap the free edge.
Other than those few niggles I really liked them!

I first tried the Black Foil over the Red Nail Polish that comes in the kit and was very impressed!
The Red Nail Polish applies really well, I was happy to leave it at one coat which is rare for me, and a bonus time wise.


I wore this combination on a night out and got lots of people grabbing my hands to have a closer look and saying how great they were. 

Other combinations I tried were-
Gold over Barry M Gelly in Plum.
Silver over Barry M Gelly in Blue Plum.
Pale Pink over Barry M Cappuccino.
White over Barry M Gelly Grapefruit.
Red over Barry M Black.


As you can see they are quite stunning and with all the possible colour combinations they are perfect for nights out, weddings, parties, New Years and Christmas.

The kit costs £29.99 which I think is good price when you consider what you get in the kit and how many manicures you could get from it. Another potential Christmas gift from Rio Beauty!

♥ A ♥

* Disclaimer: This product was sent to me for review by Rio Beauty. Everything you read here is my honest opinion of the product after trying it out on myself. *

LinkWithin

Related Posts Plugin for WordPress, Blogger...