Monday, 26 November 2012

Lazy 15 Nail Challenge - Day 11 Fireworks/Bonfire Night Nails

Just a quick one today as I have a poorly little boy off school today!

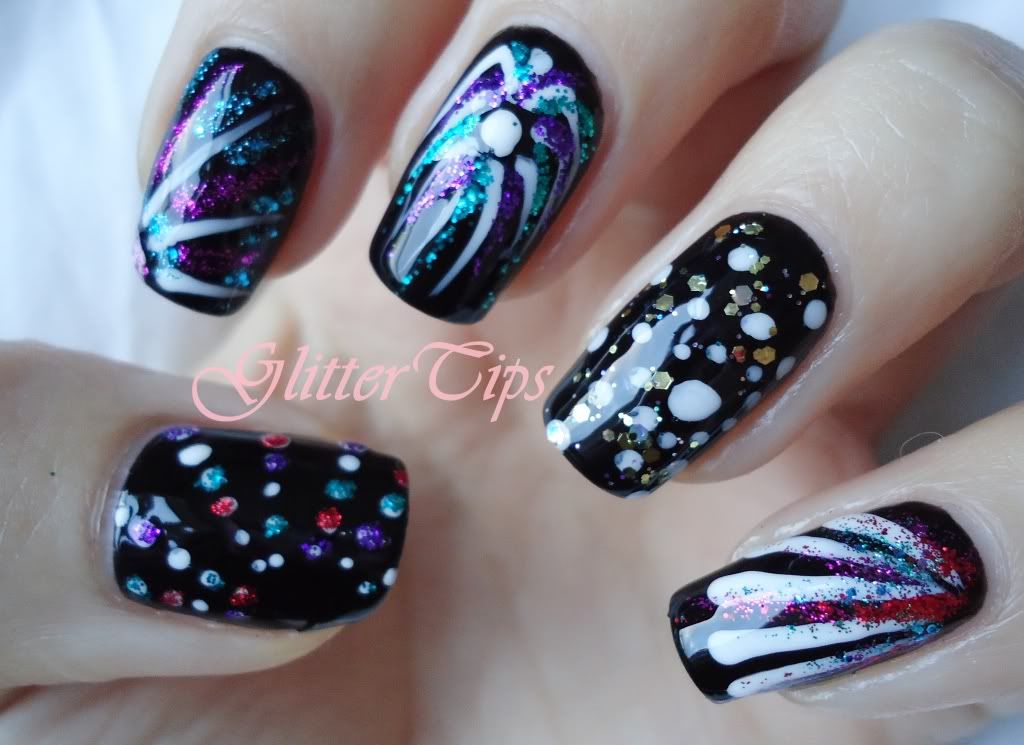
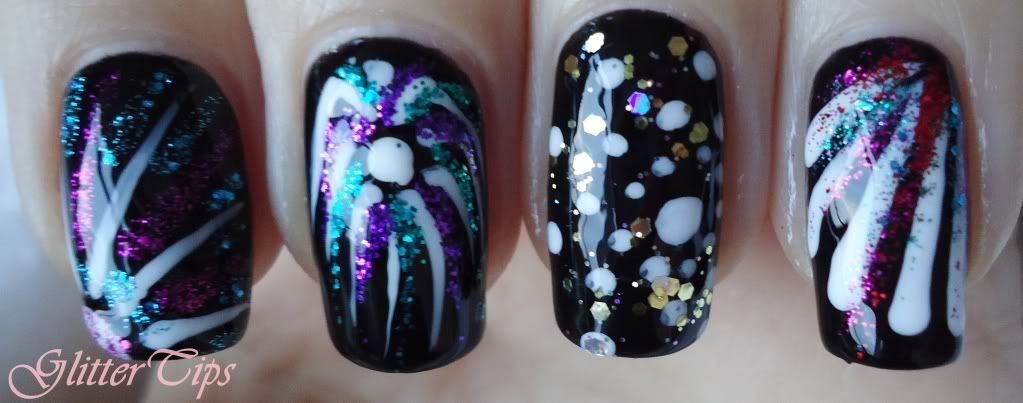
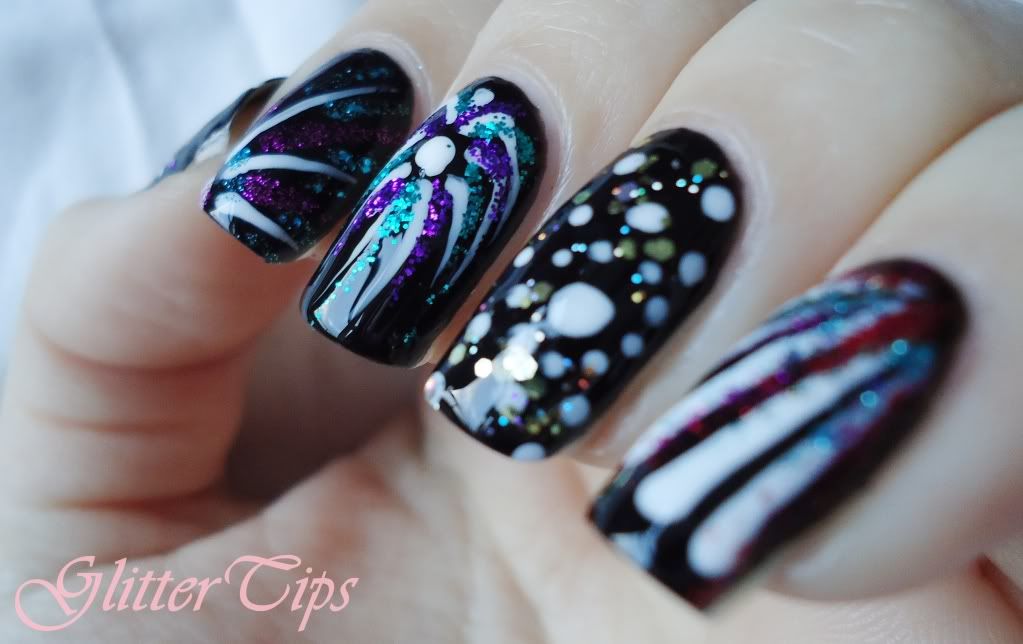
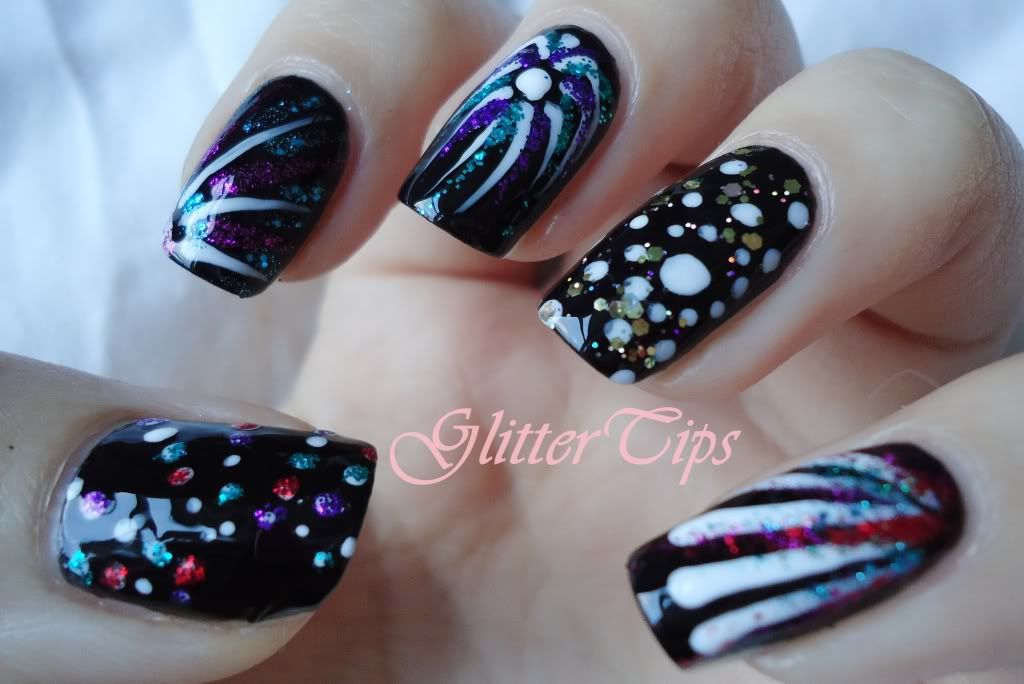
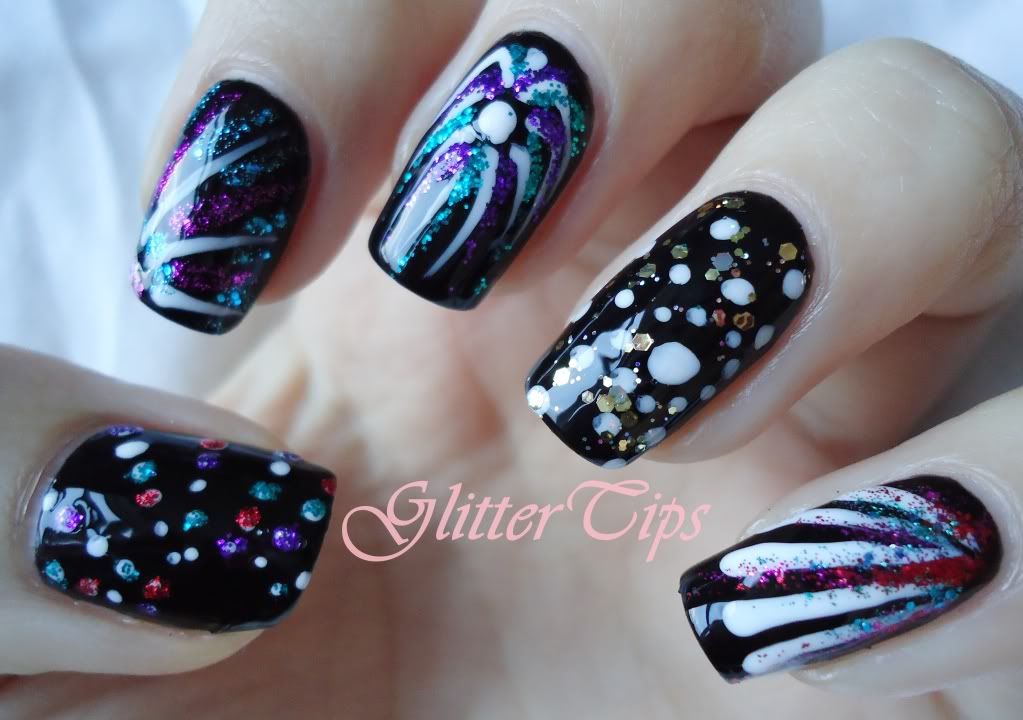
Todays challenge was Fireworks/Bonfire Night Nails and I went for fireworks.


For this I used two coats of Barry M Black as a base, then used Barry M Matt White to do the basic firework shapes. Then I added some glitters for sparkle, shame them weathers too dull to capture it!
The glitters I used were Models Own Purple Haze, Emerald City and Barry M Yellow Topaz, Magenta Glitter, Green Glitter, Red Glitter and Aqua Glitter.

Next up is Fairy Tale!

♥ A ♥

Friday, 23 November 2012

Lazy 15 Nail Challenge - Day 10 Underwater Creatures/Mythical Water Creatures

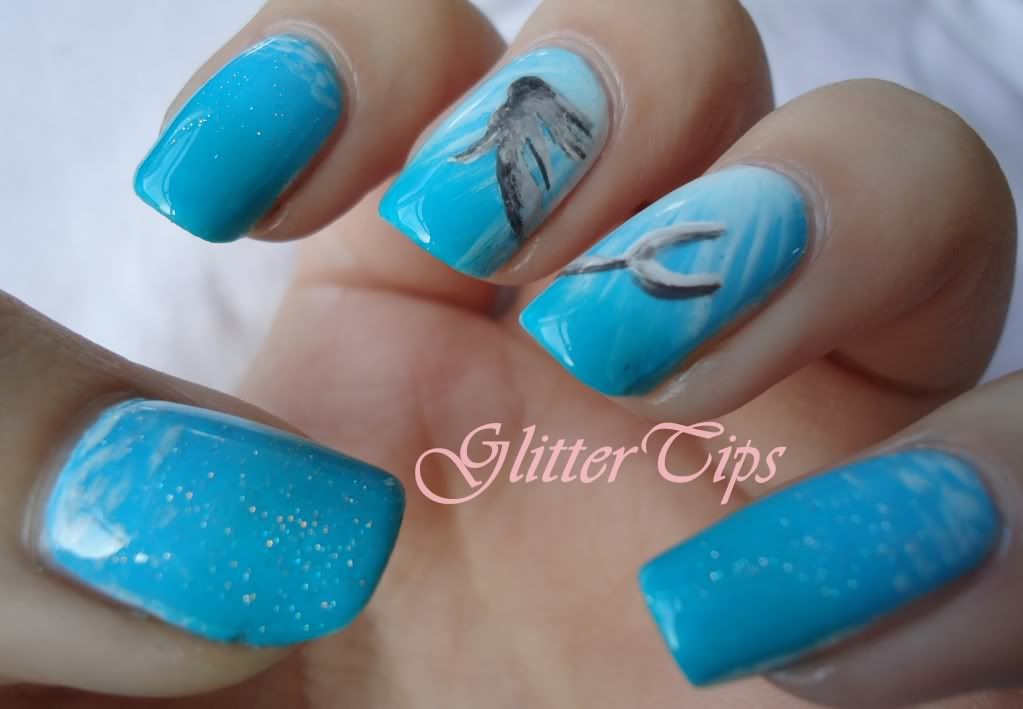
Today is day 10 of the Lazy 15 Challenge and the theme is Underwater/Mythical Underwater Creatures.
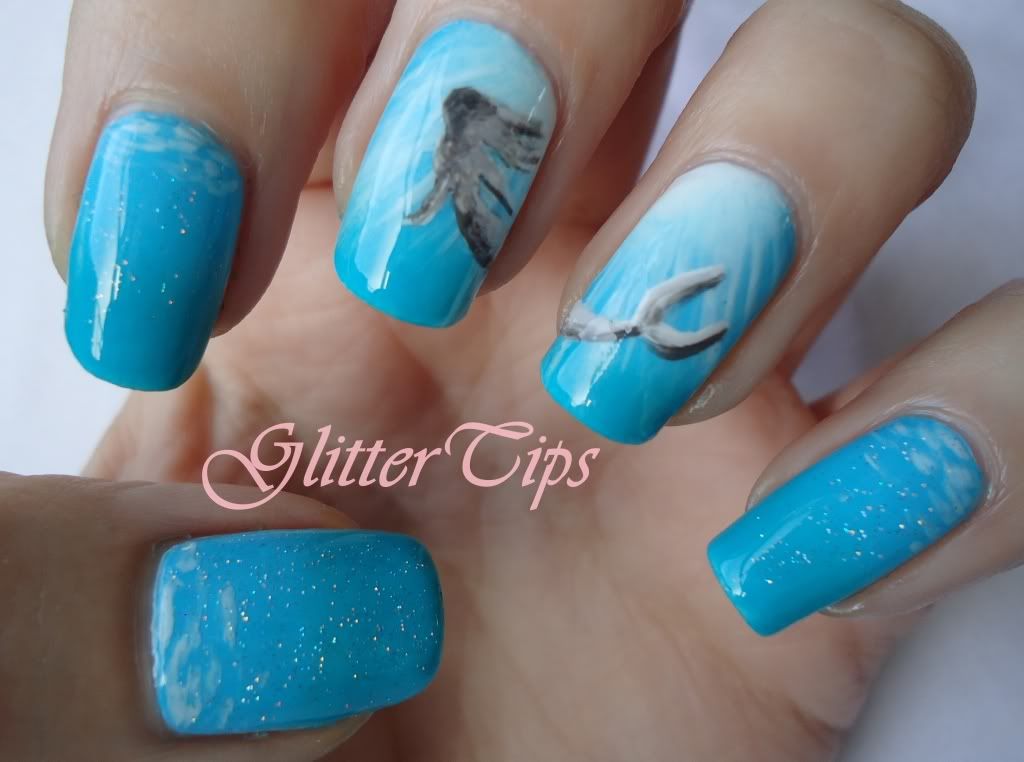
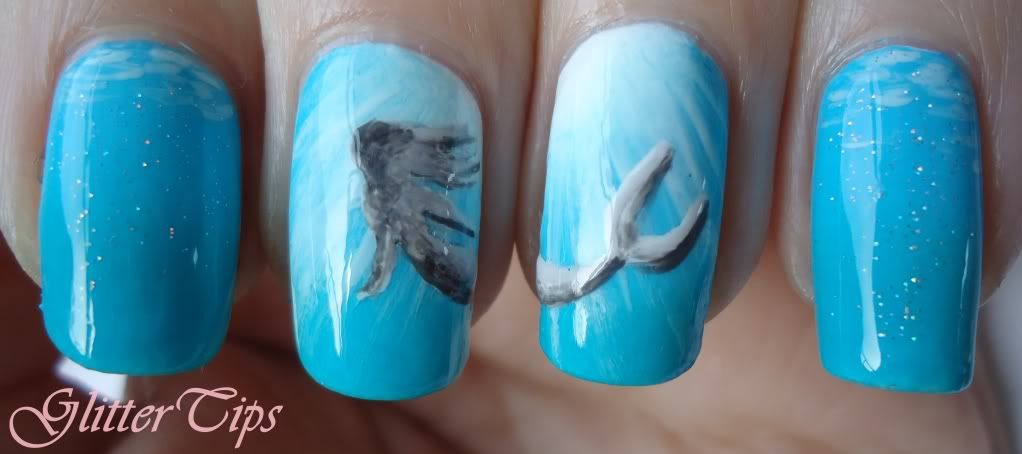
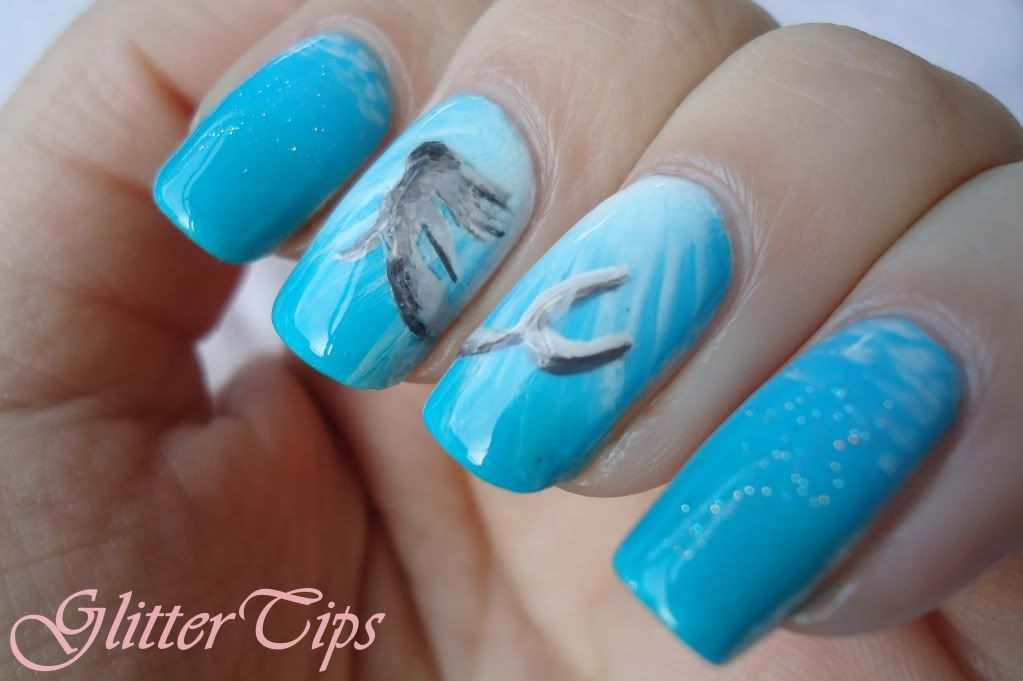
I knew as soon as I saw it I was going to do mermaid nails. I toyed with the idea of octopus/kracken nails, but I just kept coming back to mermaids.


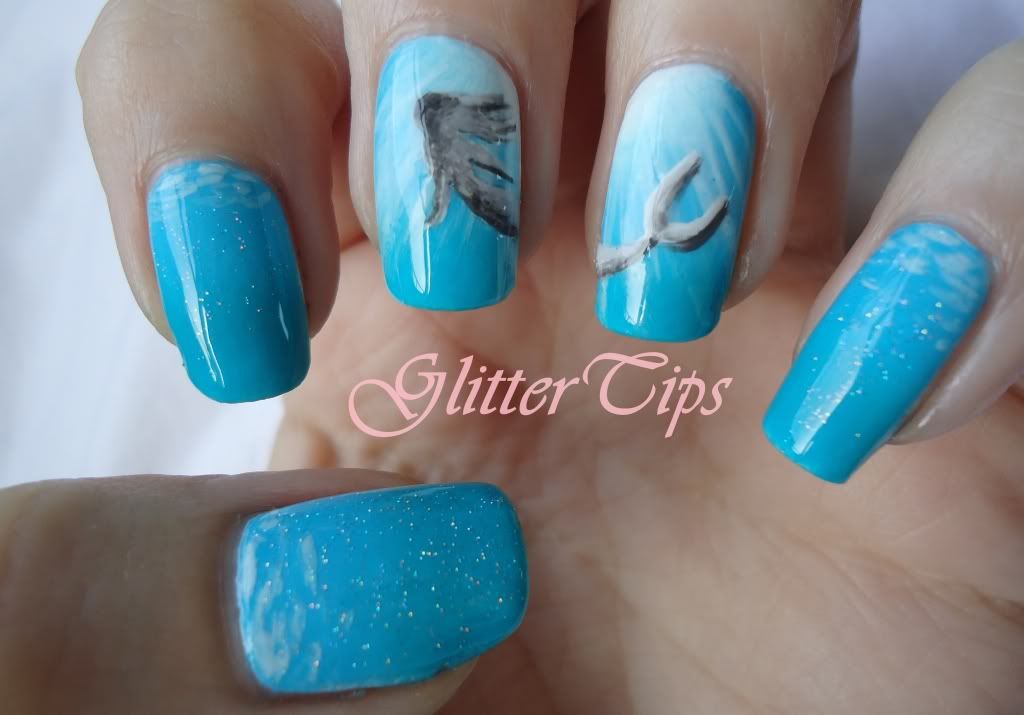
I wanted to give the effect of looking up from under the water at the mermaid against the light, as if she was spotted by some scuba divers or something. I'm fairly certain I'm not describing it very well but hopefully you catch my drift!

I started by applying a gradient over a base of Barry M Matt White.
For the gradient I used a piece of kitchen sponge as usual. On the ring and middle fingers I added Barry M Matt White to the top right/left corners then Barry M Pure Turquoise and Rimmel London 60 Second Nail Polish in Sky High which is a bright teal.
On the pinky, index and thumb I just did a normal gradient of the Pure Turquoise and Sky High.
When that had dried, I mixed a little Pure Turquoise and Matt White and used it on the two middle fingers lightly with a bit of acetone to make the lights rays coming through the water, then roughly at the top of the other three nails to look like light reflecting off the surface of the water.
Next I did the shape of the mermaid in Matt White, then mixed Matt White, Grey and Black, all by Barry M, to do the shading.
To finish I used China Glaze Fairy Dust on the pinky, index and thumb for a little sparkle then topcoated with Seche Vite.

Unfortunately the greeny teal shade of Sky High doesn't show up in the photos, which is a pain as it gives a bit of depth. But other than that I am in love with this one, I'd totally keep it on all weekend if I wasn't going out tomorrow evening!

Hope you all have a fab weekend!

♥ A ♥

Thursday, 22 November 2012

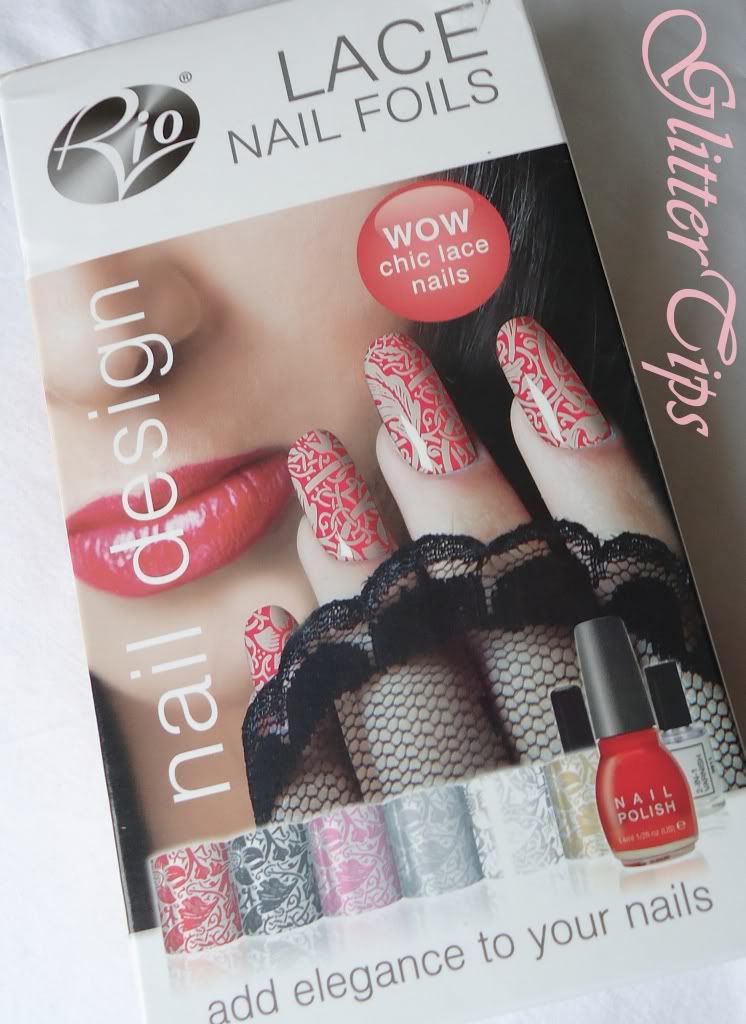
Rio Beauty - Lace Nail Foils Kit Review

A couple of weeks ago I was very kindly sent another one of the Rio Beauty Nail Art Sets to review.
This time I was sent the gorgeous Lace Nail Foils which I have been having a lot of fun with!


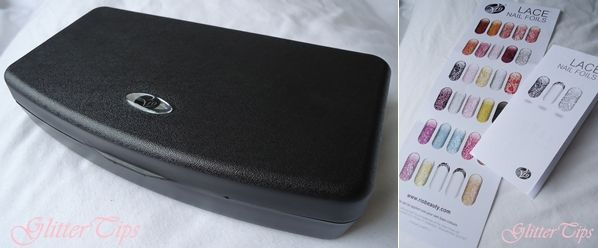
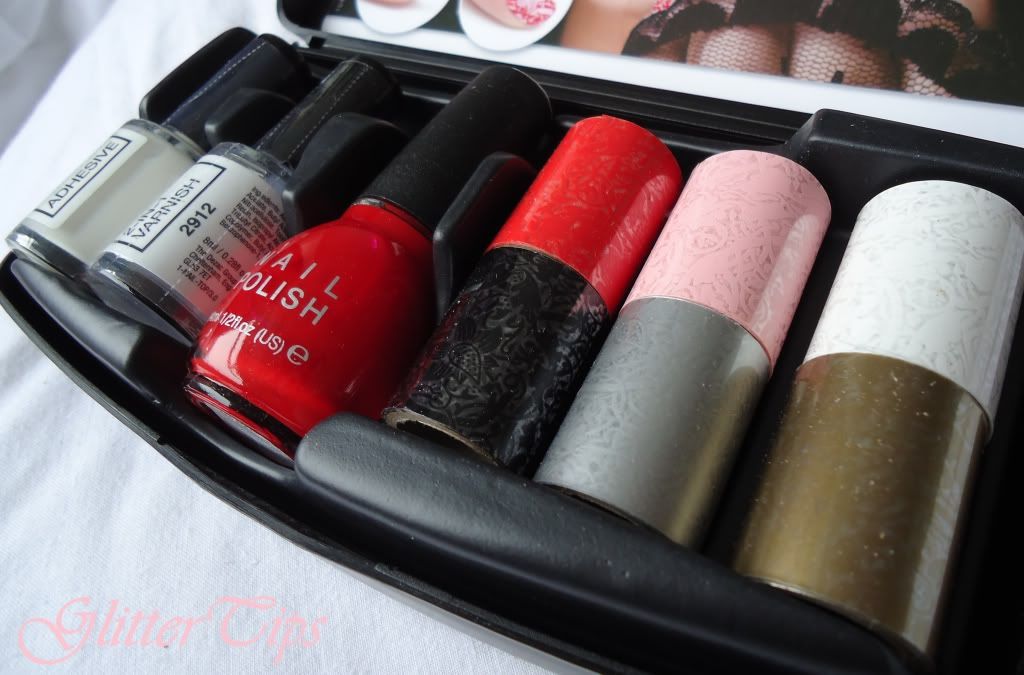
The kit comes in a little black case which contains- 

1 x 8ml bottle of Foil Adhesive.
1 x 8ml bottle of 2 in 1 Varnish.
1 x 14ml bottle of Red Nail Polish.
6 x rolls of Lace Nail Foils in the colours Black, White, Gold, Silver, Red and Pale Pink.
Application stick.
Design Chart.
Instructions.


They are really very simple to apply and the instructions are clear and easy to follow.
First of all you need to cut the foil into little strips wide enough to cover your nail.
Then apply your chosen nail polish to clean, dry nails and leave to dry for at least 30 mins.
Next apply the adhesive, and wait for 10 mins.
Place the foil strip over your nail and use the application stick or a cotton bud to rub over the foil to ensure it sticks and to smooth out any creases.
Gently peel the foil off and seal with 2 in 1 Varnish, remembering to cap the free edge.

A few problems that I did come across were- 
The pattern not sticking in places, which is easily fixed by just reapplying the adhesive and patching it up.
 Creasing was a bit of a problem but I wouldn't say that was the kits fault, I do have rather curved nail beds making creases inevitable and it is only noticeable if you are really looking at them. 
Sometimes my base colour peeled off, but that was my own fault by trying to guess how long the nail polish was drying for and applying the foils way too early, the obvious way to avoid this is to actually pay attention to the time when applying and make sure you wait the 30 mins for the nail polish to dry, possibly a little longer, and the 10 mins for the adhesive to dry. Once I started paying attention rather than guessing the application was easy peasy!
Wear an tear was a bit of a problem too, the 2 in 1 Varnish is not going keep these looking good much longer than a day, you need to apply a harder wearing top coat after the 2 in 1 Varnish to protect them. If you want them to last a week or more I'd advise reapplying your topcoat every couple of days and make sure you cap the free edge.
Other than those few niggles I really liked them!

I first tried the Black Foil over the Red Nail Polish that comes in the kit and was very impressed!
The Red Nail Polish applies really well, I was happy to leave it at one coat which is rare for me, and a bonus time wise.


I wore this combination on a night out and got lots of people grabbing my hands to have a closer look and saying how great they were. 

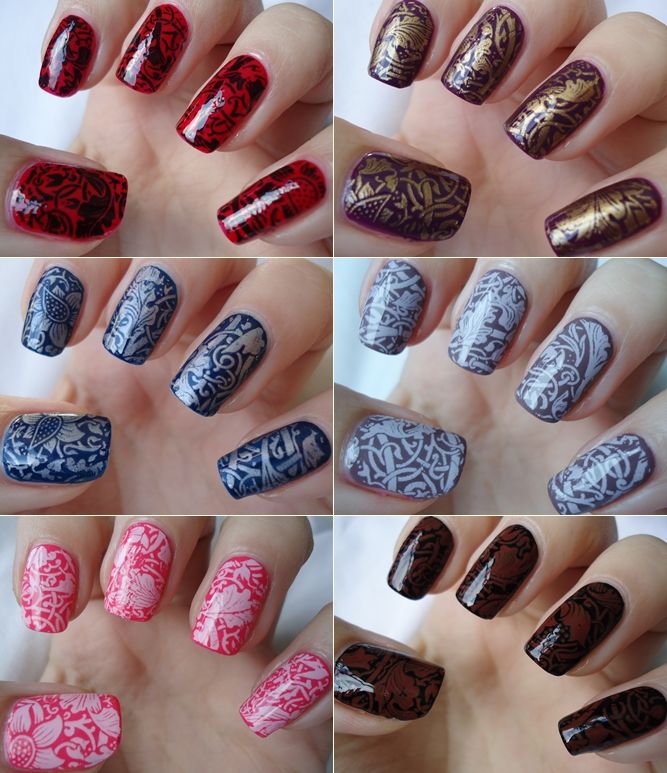
Other combinations I tried were-
Gold over Barry M Gelly in Plum.
Silver over Barry M Gelly in Blue Plum.
Pale Pink over Barry M Cappuccino.
White over Barry M Gelly Grapefruit.
Red over Barry M Black.


As you can see they are quite stunning and with all the possible colour combinations they are perfect for nights out, weddings, parties, New Years and Christmas.

The kit costs £29.99 which I think is good price when you consider what you get in the kit and how many manicures you could get from it. Another potential Christmas gift from Rio Beauty!

♥ A ♥

* Disclaimer: This product was sent to me for review by Rio Beauty. Everything you read here is my honest opinion of the product after trying it out on myself. *

Wednesday, 21 November 2012

Lazy 15 Challenge - Day 9 Disney

Yay, I'm posting on time!
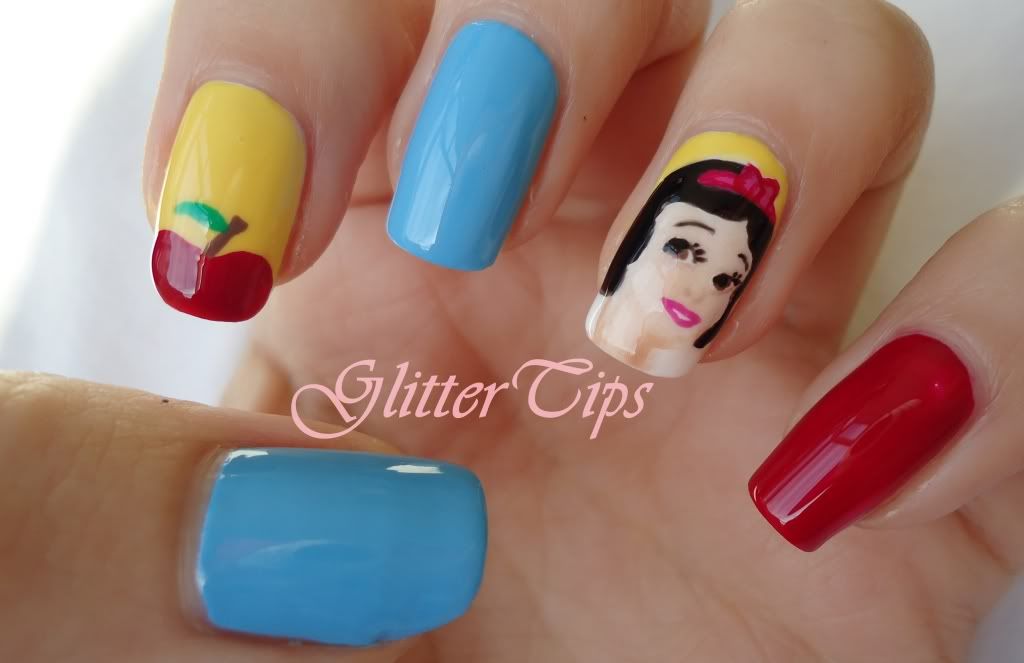
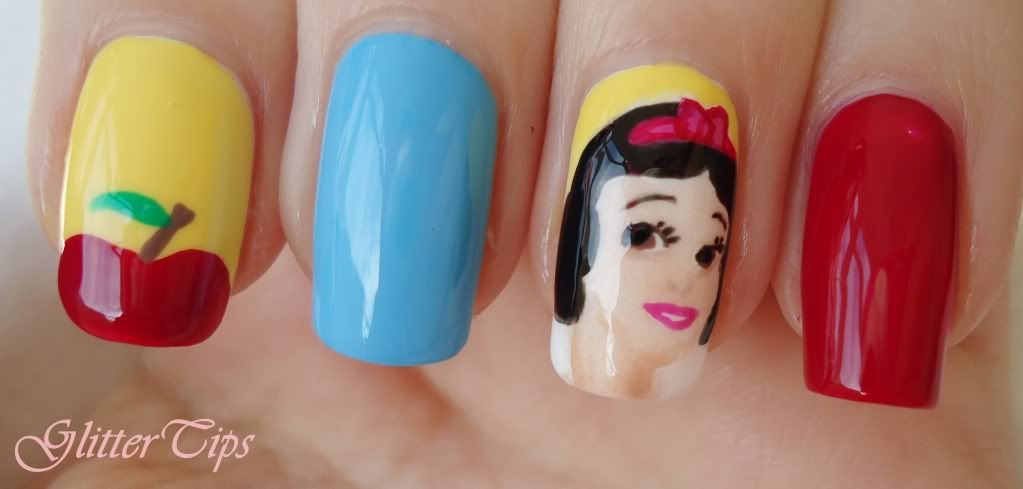
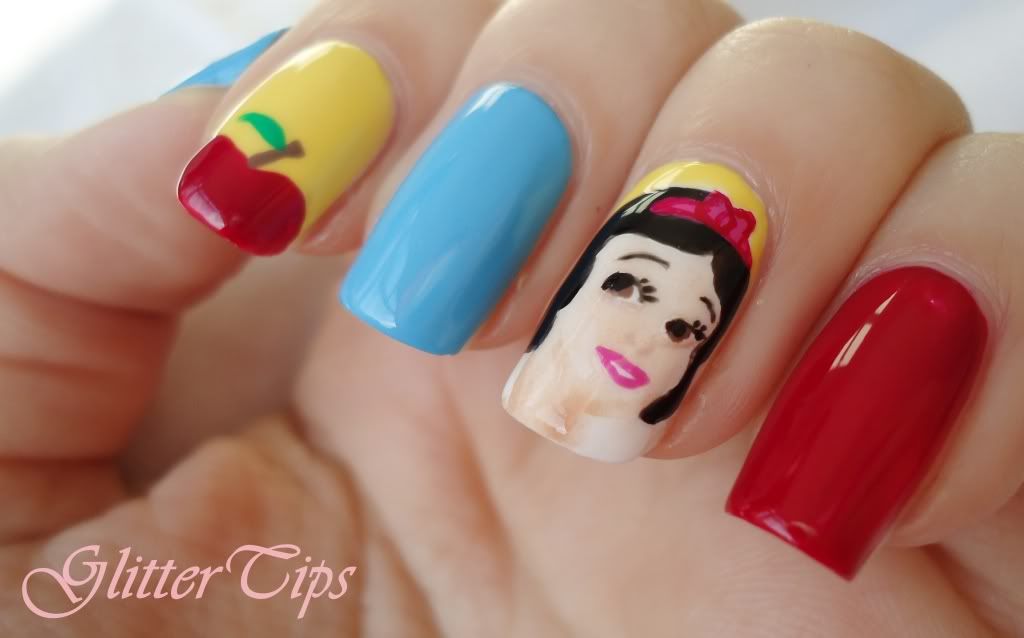
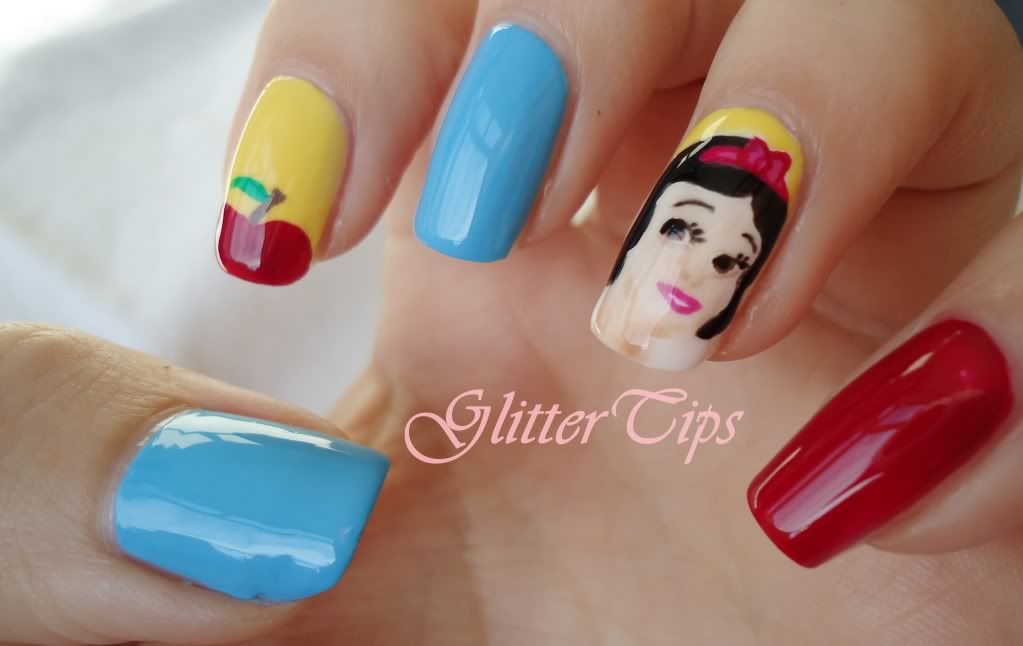
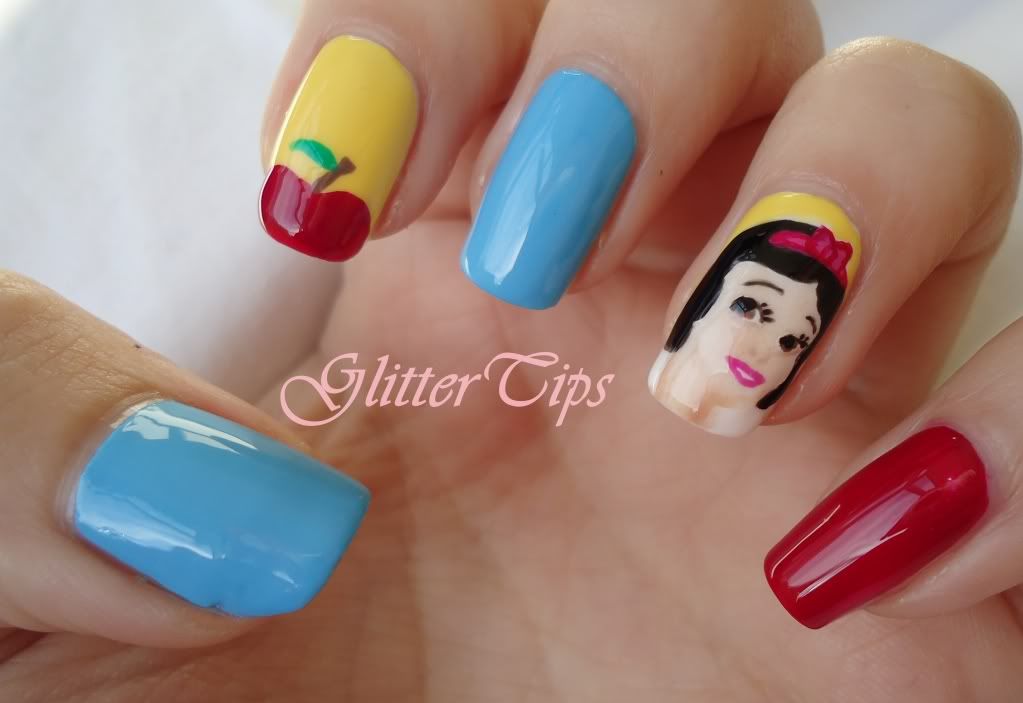
Today's theme is Disney Film or Character, so I thought I'd continue with the Disney Princess nails as I've already done Rapunzel and Jasmine.
Originally I wanted to do Cinderella but I changed my mind last minute and did Snow White instead!


This is actually Snow White Mk2 as my first Snow White had a beard due to the shading under the chin going wrong, not a good look for a Princess!

The colours used are - 
Pinky - Barry M Raspberry over Barry M Matt White.
Ring - Barry M Matt White with Lemon Ice Cream over the top for a base, then Barry M Black for the hair, eyelashes, eyebrows and pupils. Barry M Nude and Famous By Sue Moxley Nude mixed for the skin, Barry M Mushroom for eyes, Barry M Raspberry mixed with Matt White for the lips and hair bow.
Middle and Thumb - Barry M Blueberry Ice Cream.
Index - Barry m Matt White with Lemon Ice Cream over the top for the base, Barry M Raspberry, Mushroom and Spring Green for the apple.

Next up is Under Water Creatures/Mythical Water Creatures, looking forward to that one!

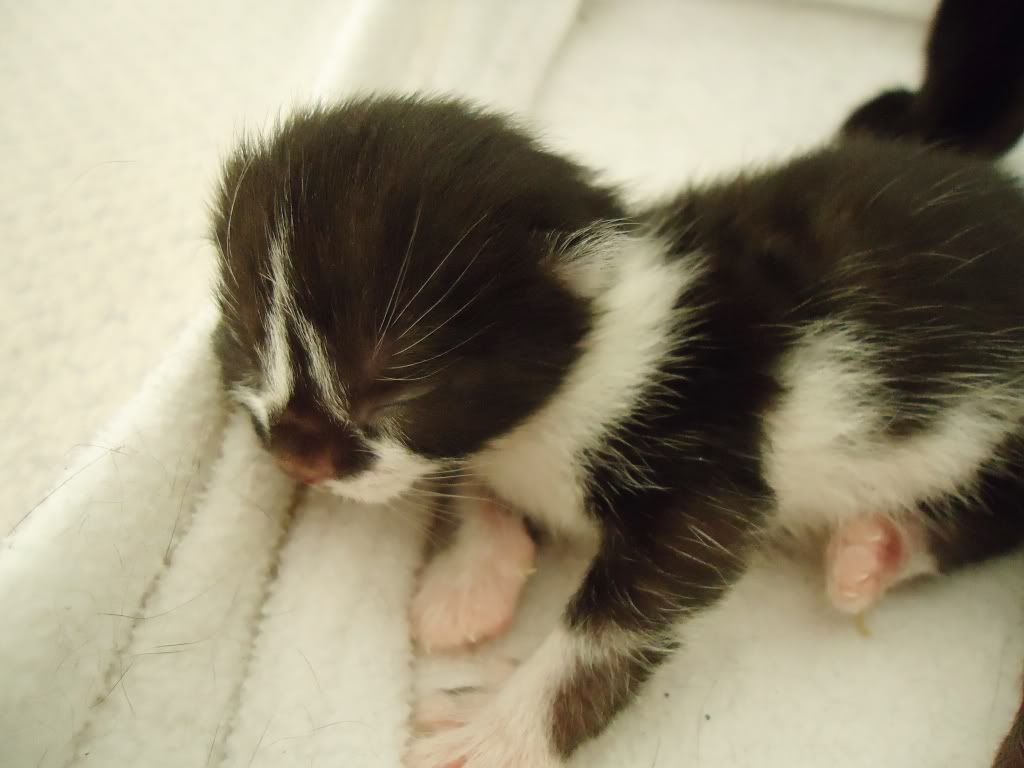
And to end the post I thought I'd share a kitten photo that I managed to get today!


♥ A ♥


Tuesday, 20 November 2012

Lazy 15 Challenge - Day 8 Dessert

I'm posting late again!
I have a really good excuse this time which I will show you at the end of the post!
But for now, straight to the nails.

The theme for Day 8 was Dessert. I had lots of ideas for this theme but only one that I really really wanted to do, and that was Ice Cream Sundae nails!


I mixed Barry M Matt White and a tiny bit of Lemon Ice Cream for the base colour and painted it on using a nail art brush. Then I used Barry M Blueberry Ice cream mixed with Matt White for the sundae bowls, Matt white for the scoop of Ice Cream, OPI Suzi Loves Cowboys for the chocolate sauce, Barry M Raspberry for the raspberry sauce and a mix of Barry M Yellow, Block Orange and Famous By Sue Moxley Nude for the toffee sauce. For the Cherries I used Barry M Bright Red and Spring Green and for the sprinkles I used Barry M Lemon Ice Cream, Blueberry Ice Cream, Mint Green, Strawberry Ice Cream and Matt White.

I love how cute these turned out, I just wish I hadn't forgotten to add the wafers! I was very sleepy though as at 5.30am Monday morning our Tiffy cat decided to wake us up with this...


!!!
We had no idea she was even pregnant!
She did have another but unfortunately he/she didn't make it :-(.
Other than that both Tiff and the kitten are doing really well!
I think the kitten looks like a little badger at the moment however MrGT tells me that those stripes are actually an Assassins Creed symbol and has named he/she Ezio.
Now if that's not a good enough reason for posting late I don't know what is.

Fingers crossed tomorrows post is up on time because tomorrows theme is Disney Movies/Characters and possibly the theme I have looked forward to the most!

♥ A ♥

Sunday, 18 November 2012

Lazy 15 Nail Challenge - Day 7 Feminine

You might notice this is late.
The reason being I struggled a lot with this one!
I knew exactly what I wanted to do, but didn't have what I needed to do it, so I tried to do something else, then something else again until I realised I'd been trying for a good couple of hours and all I had done is cover myself in glitter, spill a cup of water over myself and get stressed out.
So, I decided rather than get myself worked up and post something I wasn't proud of, I'd wait until I could get what I needed and try again.
Better late than never!

So here is my interpretation of Feminine Nails!


I got my inspiration from the inside lid of a storage box my Mum uses at home for her beads.
I took a photo of it on my phone and used it to work from as you can see below.


First of all I painted two coats of Barry M Matt White. Then I used the newspaper method where you cut squares of newspaper large enough to cover your nails, and use an alcohol (Vodka to be precise!) soaked cotton pad to hold the newspaper to your nail for about 10 seconds, being careful to hold it still, then remove.
I then applied Famous By Sue Moxley Nude mixed with some Models Own Topcoat roughly over the top to give it a slightly vintage/distressed look.
After a a layer of topcoat to protect the newspaper print effect I used Barry M Bright Red, Yellow, and Block Orange watered down with acetone to create the watercolour flowers, I added a bit of Barry M Black and Matt White to the center of the Poppies, then did the leaves with Barry M Lime Green and Spring Green.
Finally I applied some butterfly Water Decals that I got from Viva La Nails and finished it all off with a layer of Seche Vite.

A fairly lengthy process using a variety of techniques I admit, but it was well worth it for the end result.

I hope you can forgive my lateness in posting!
I will do my utmost to post on time tomorrow, for which the challenge is Dessert Nails, that should be fun!

♥ A ♥

Wednesday, 14 November 2012

Lazy 15 Nail Challenge - Day 6 Favourite Colour

It's Day 6 of the Lazy 15 Challenge!
Today's challenge is Favourite Colour which for me is pink.

I have a feeling the colour pink is going to be quite popular for todays challenge!
I have always loved pink, I went through a phase in my teens of pretending to hate it because it just wasn't cool to like pink. Then when I had my daughter in my early 20's it seemed like my entire life turned pink! Any other mums find that? As soon as you have a baby girl you live in this sort of pink haze for at least 2-3 years. My daughter is almost 6 now and is slowly starting to realise there are other colours!
Also my wedding, two and a half years ago, was pink. Not bright in your face pink, it was a soft dusky, vintage, pale pink. My absolute favourite shade of pink.

Which brings me on to the nails.


I got the idea for these nails from THIS YouTube video by JaeMarie2008 who has loads of fab nail art that you might like on her channel.

I did this a little differently to the video.
First I taped off the triangle st the cuticle. Then I applied two coats of Boots 17 Sweet Kisses and removed the tape. When that had dried I re-taped them and applied Barry M Rose Quartz Glitter with a small nail art brush, arranging the glitter in a gradient effect. Then to tidy up the edge I finished with a line of Barry M Pink Silver Glitter at the edge and topcoated with Seche Vite.

I kinda wish I had these nails for my actual wedding as they would have been perfect but I wasn't into nail art at all then!

Next up for Day 7 of the Lazy 15 Challenge is Feminine Nails.

♥ A ♥

Monday, 12 November 2012

Lazy 15 Nail Challenge - Day 5 Galaxy Nails

Today is Day 5 of the Lazy 15 Nail Challenge and the challenge is Galaxy Nails!
I warn you now this is slightly picture heavy.
I love love love galaxy nails! They are fun, they are easy and they look amazing.
What's not to love?


I decided to do these galaxy nails a little different to the last ones I did (HERE).
Last time I tried to actually mimic galaxy shapes from images I had found on Google.
This time I wanted to do something a little bit less structured if that makes any sense?
This is where Google Images came in handy once again, I found three images that I liked (which I will include at the end of the post) and went about searching my nail polish collection.

I started pulling out some colours that I thought might work well then I remembered this post over on Truly Madly Beauty where the lovely Aysh layered Models Own Hayley's Comet over a black nail polish and it gave me an idea!


More after the jump...

Friday, 9 November 2012

Lazy 15 Challenge - Day 4 Water Marble

Today is day 4 of the Lazy 15 Nail Challenge and the challenge is water marble.
Water marbling has always been a challenge for me. I had my first marble success using the Rio Beauty Water Marble Kit a few weeks ago and since then I have been trying other polishes in my collection to see if I could complete a mani using those.
Lucky for me I managed it today!


For the base colour I used Barry M Black then used China Glaze Want My Bawdy, Swanky Silk, Deviantly Daring and No Plain Jane from the Bohemian Collection to do the water marbling.

I can't tell you how relieved I am that it worked!
It wasn't easy, I still quite haven't got my technique right as you can tell from the water bubbles and I had to re-do a couple of nails where I wasn't happy with the first outcome but I am so please with them.
I love how the China Glaze polishes give the most beautiful 'oil on water' effect over the black.

Next up for the Lazy 15 Challenge is Galaxy!
I cannot wait to give that another try.

♥ A ♥

Wednesday, 7 November 2012

The Lazy 15 - Day 3 Dots

Day 3 of the Lazy 15 challenge is Dots.
I struggled with today. There are so many different dot designs to choose from but I think sometimes too much choice makes things more difficult.
Anyway, this is something I've seen done a few times now and I've always really liked it so I decided I'd give it a try for todays challenge.


For this I used OPI Skull & Glossbones as a base, then GOSH Gold and OPI Suzi Loves Cowboys for the pattern. I used a brush to paint on the joined dots and a large dotting tool for the center dots.
I quite like this one! It's a shame I have to take it off pretty much right away but I'm sure I'll be trying this out in many more colour combinations in the future.

♥ A ♥


LinkWithin

Related Posts Plugin for WordPress, Blogger...