Showing posts with label Glequins. Show all posts

Friday, 24 May 2013

Neon 80's Nails - Nail Art

First of all I'd like to apologise for my absence yesterday, my internet disappeared off for a day and I hadn't yet scheduled the post I had planned. It's just as well really as I have decided to take a slightly different route with it so now I have the weekend to tweek a few things ready for next week!

Anyway, today I have some 80's/90's style nails for you.
They weren't intended to be 80's/90's it just happened that way, but I really liked them anyway.


I used Barry M Matt White as the base then taped off random triangles with normal cellotape and used China Glaze Hang-Ten Toes and Surfin' For Boys on alternate nails. When that was dry I taped off the lines and used Barry M Black. I felt it needed a bit of sparkle so I added some silver Glequins from the Born Pretty Store (review HERE) and finished with a coat of Seche Vite.

 Like I said, I never intended for them to have an 80's/90's feel at all. It started as an abstract colour blocking idea I had but I just love the way it turned out. They remind me a bit of the Misfits from Jem and the Holograms!

♥ A ♥

Tuesday, 14 May 2013

Born Pretty Store - Wax Rhinestone Picker Pencil

I have another Born Pretty Store review for you today.
At the same time as I received the Nail Stud Wheel I reviewed yesterday I also received two white wax pencils.


You probably have a fair idea of what these are used for but for those of you who don't, no I have not lost my mind, and yes this is nail art related.


They are used for picking up rhinestones/studs/glequins/etc and placing them on the nail.
I used to use an orange stick dipped in clear nail polish to pick these fiddly things up and while that did work fine, I much prefer using the wax pencil.


These make short, mess free work of picking up and individually placing glequins etc, so if the thought of spending several frustrating hours faffing around with rhinestones puts you off experimenting with them then I highly recommend trying these out. They'll last you a while and are a great basic to have in your nail art arsenal.
You get two for $1.99 HERE with free worldwide shipping. you can also use the code QPL91 for 10% off anytime.


♥ A ♥

Thursday, 14 February 2013

Valentines - Nail Art

Today is Valentines Day and I have to say I am not much of a fan.
But I have made somewhat of an effort and put a heart on one of my nails so I thought I'd show you!


For these I started with two coats of Barry M Matt White and used Avon Nailwear Pro Vintage Blue to make the umbrella/pinwheel pattern.
It's quite tricky to try and explain clearly how I did it but I'll give it a go.
I started with a really small dot roughly in the center of my nail, and made a line with the blue polish from the dot to the edge of my nail, I then made another line from the dot to the side of my nail so I had a quarter marked out. I then divided that quarter into four and painted two of those sections with the blue and repeated for the other three quarters.
If that makes as little sense as I think it does let me know and I'll make a tutorial!

For the heart I used China Glaze Igniting Love and Barry M Red Glitter then just framed the pinky and index fingers with red Glequins!

I like it, it's not too Valentines-y but shows that I'm aware of the date and that I'm not a completely bitter married just yet ;-) I suppose you could make it a bit more valentines appropriate by using reds and/or pinks instead of blue and white but I really like theses colours together, it's a combo I'll be sure to use again.

Hope you are all have a good day!

♥ A ♥

Friday, 1 February 2013

Glitter Tips Gleeq Week - Day 5


Today is Day 5 and the final day of Gleeq Week!
I wanted to do something a little softer today so I went for a pale pink base and the light gold Glequins.


I'm not sure how well you can see it, but it's supposed to be a bow.
I started with the bow on the ring finger then made the ribbon ends loop and trail across the rest of the nails.
The base colour is two coats of Barry M Baby Pink over two coats of Matt White.

You can purchase the set of Glequins I have been using this week from the Born Pretty Store HERE for $6.45 with free delivery. Don't forget to use the code QPL91 to get 10% off your order. The code will remain up in my sidebar for you to use anytime you might want to make a Born Pretty Store order!

I hope you have enjoyed Gleeq Week and it has given you some ideas of how Glequins can be used, I have had so much fun playing with them this week that they have become a firm favourite and a staple in my nail art draw! I will most definitely be reaching for them regularly.

♥ A ♥

Thursday, 31 January 2013

Glitter Tips Gleeq Week - Day 4


Today is Day 4 of 'Gleeq Week' and I went for circles.


I started with two coats of Nails Inc Tudor Way then placed a silver Glequin in the center of each nail to work round for the circles. Originally I just did the ring of light blue and dark blue and top coated, then I decided it needed more silver so added the extra ring which I'm really glad about as it really finished it off.

You can purchase Glequins from Born Pretty Store HERE for $6.45 with free delivery. You can get 10% of your order using the code QPL91 which will also be in my side bar!

I hope you have been enjoying 'Gleeq Week' and come back tomorrow for the last day!

♥ A ♥

Wednesday, 30 January 2013

Glitter Tips Gleeq Week - Day 3


For Day 3 of Gleeq Week I thought I'd show you one of the first designs I did using Glequins.


I decided on a diamond pattern and picked Avon Vintage Blue as the base colour. Then I picked the light green and blue coloured Glequins for the diamond pattern.
It's not as neat as the previous two designs from days One and Two, but I really liked the colours and the pattern so I still wanted to show them.
I really enjoyed wearing these, after a while the diamonds started to look like little fish to me!

You can purchase the Glequins from the Born Pretty Store HERE for $6.45 with free delivery and you can get 10% off your order using the code QPL91 which is also in my side bar.

I hope you liked these as much as I did and come back tomorrow for Day 4 of 'Gleeq Week'!

♥ A ♥
Tuesday, 29 January 2013

Glitter Tips Gleeq Week - Day 2 Glequin Gradient


It's Day 2 of 'Gleeq week' and today I have a Glequin Gradient to show you.

If you missed yesterdays Glequin mani and my review of the Born Pretty Store Glequins you can see that HERE.


This was so tricky to photograph!
Hopefully you can get the idea from the pictures though.
I've used two coats of Barry M Matt White as a base and positioned the Glequin gradient across the middle of the nails. I also tried to give the effect of it fading out to the top and bottom of the nails too if that makes any sense at all!?
Starting from the thumb the colours are Red to Orange, Pale Pink to Pale Lilac, Dark Blue to Turquoise, Dark Green to Lime Green, Pale Green/Gold to Silver.

You can purchase the Glequins from the Born Pretty Store HERE for $6.45 with free delivery and you can get 10% off using the code QPL91 which is also in my side bar!

I hope you have enjoyed Day 2 of 'Gleeq Week' and see you tomorrow for Day 3!

♥ A ♥
Monday, 28 January 2013

Glitter Tips Gleeq Week - Born Pretty Store 'Glequins'


As I mentioned in yesterdays post this week is 'Gleeq Week' on Glitter Tips.
I was kindly sent a 12 pack of 'Glequins' from Born Pretty Store to review and I had so much fun using them I thought I'd make a week long series of posts.


For those of you who don't know what 'Glequins' are I will explain the best I can.
They are hexagonal pieces of glitter that come in many different. They were dubbed 'Glequins' by Sammy at The Nailasaurus as she felt they were to large to be called glitter but too small to be called sequins, so using both the words 'glitter' and 'sequin' she coined the term 'Glequin'. And it stuck!


I find the best method of applying these fiddly little things is to first apply your base colour and wait for that to dry. Then apply a coat of normal, not fast dry, topcoat or clear polish and use the end of an orange stick dipped in topcoat/clear polish to pick up the 'Glelquins' and gently place onto the wet/tacky nail. I then finish with another coat of the normal topcoat and a coat of my Seche Vite Fast Dry top coat, mainly because my nails don't feel finished without it now, but also because it leaves the surface nice and smooth for extra sparkle. And boy do these sparkle!

My first 'Glequin' look is after the jump!


Wednesday, 2 January 2013

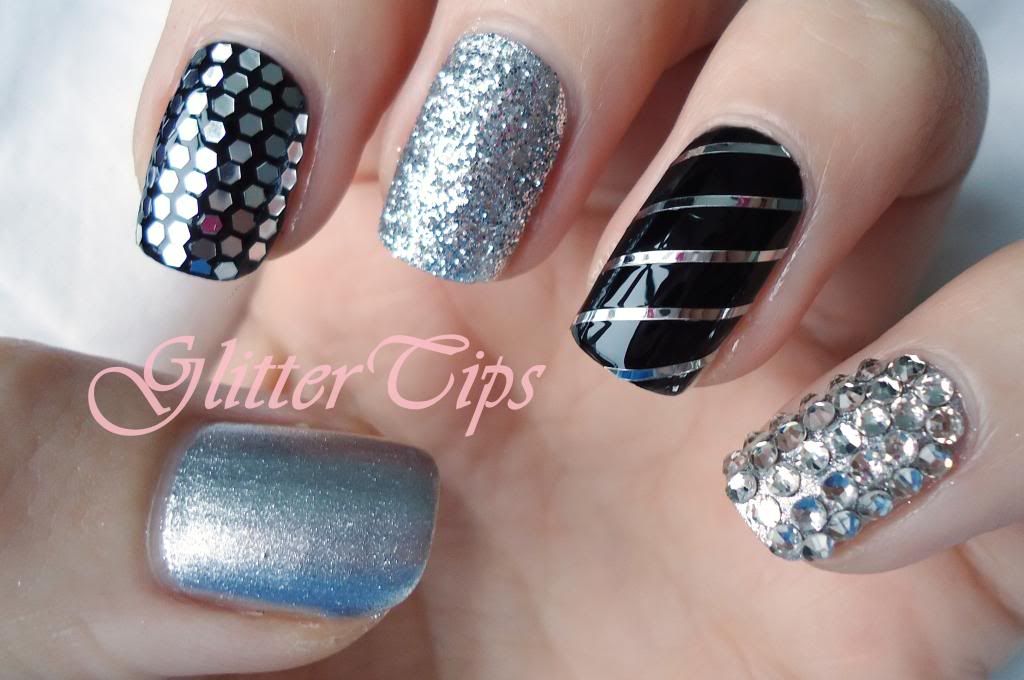
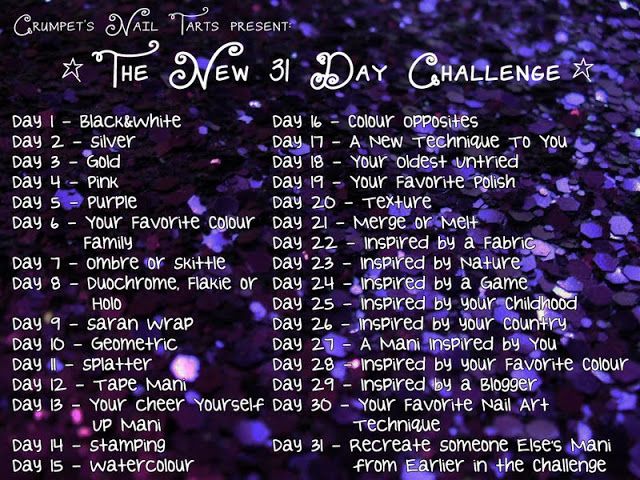
The New 31 Day Nail Challenge - Day 2 - Silver

Today is Day 2 of The New 31 Day Nail Challenge and the theme is silver!
I wasn't a fan of today's theme, I don't really use silver as an all over colour because I don't really enjoy wearing metallics, so I tried to think of a way to do a mani where silver is definitely the feature, but without it being just silver.
I think I managed it, and I have to say I love it!


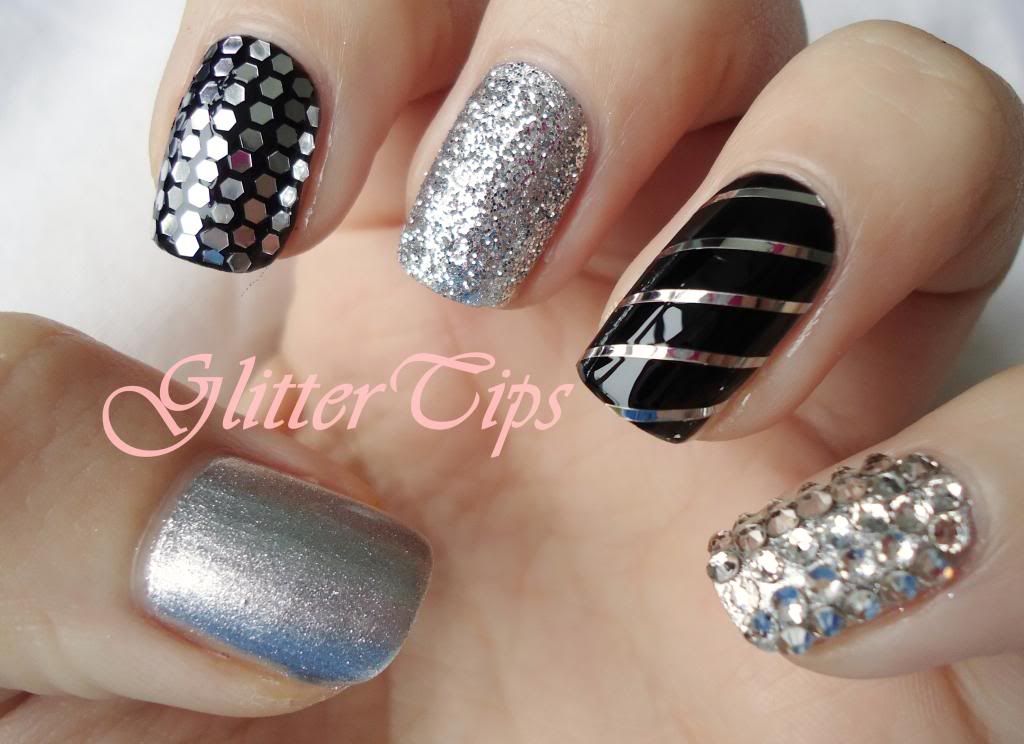
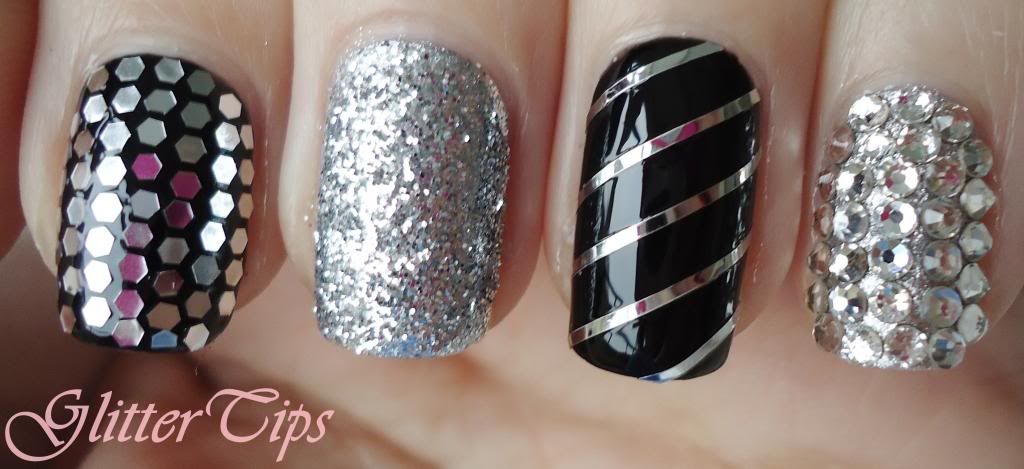
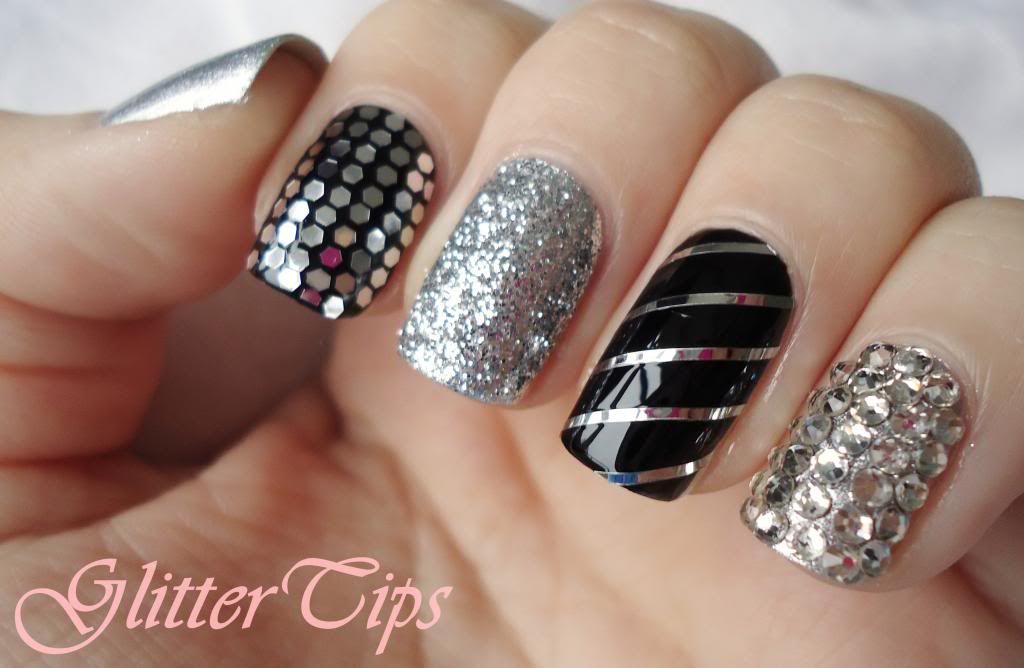
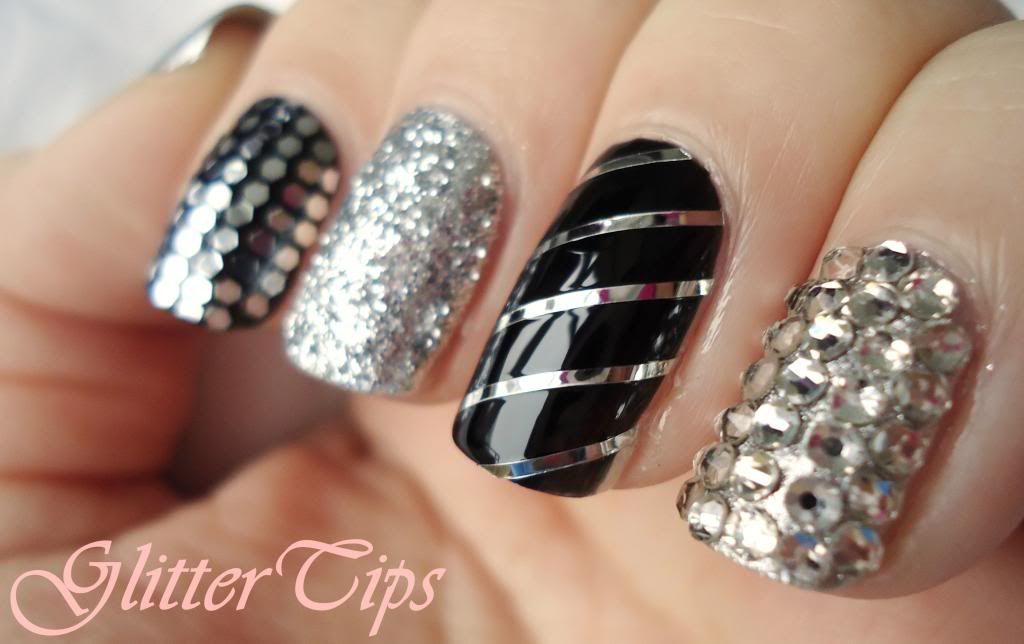
The base colour for the Pinky, Middle and Thumb is two coats of Models Own Sterling Silver, which is such a gorgeous silver colour, not too dull, not too bright and perfectly shiny!
The Index and Ring fingers have the trusty Barry M Black as a base.
I added some flat back Swarovski Crystals to the Pinky, which I bought in a pack of 200 for £8.95 from ebeautytraining on eBay. Some silver striping tape, also purchsed from eBay (I don't recommend the seller so I won't include a link) on the Ring finger. Some Ultra Fine Art Glitter, which I found in my old craft stash in the loft but can probably be bought in most craft stores, to the Middle finger. Some Born Pretty Store silver 'Glequins' (Review coming soon!) to the Index finger and then left the Thumb plain to show off the Models Own Sterling Silver.

I really wish I had done this for New Years! But I expect I will be repeating this one for many occasions as I love it so much!


Tomorrows challenge is Gold!
Don't forget to check out what the other ladies taking part have come up with.

♥ A ♥
Friday, 17 August 2012

Glitter Framed Nails

One of my favourite nail blogs to read is The Nailasaurus.
I just love how everything she does on her nails is always so neat, precise and clean looking!
Something that I have seen a lot over on The Nailasaurus recently is Hex Glitter or 'Glequins' as she has aptly named them.

When doing my nails for the metallic day of the 15 Day Nail Challenge, the glitter in Milani Jewel FX Gold reminded me of glequins and today when pondering what to do on my nails I came across it again and knew exactly what I wanted to do.


I loved them exactly how they were, but I had lots of ideas floating around my head and it wasn't enough.
So I took it a bit further.


I'm hooked.

The polishes I used were Boots 17 Lasting Fix in Royal Indigo and Milani Jewel FX Gold applied painstakingly slowly with an orange stick.

They remind me of little sheilds, what do you think?

♥ A ♥

LinkWithin

Related Posts Plugin for WordPress, Blogger...